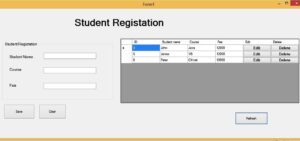
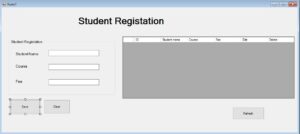
This C#.net Crud will teach you how to do basic database functions that are CREATE RETIEVE UPDATE and DELETE using Microsoft Server 2012 Database. The INSERT, SELECT, UPDATE and DELETE statements can be used in any database system, because this is support by all relational database systems.
We will learn how to INSERT, SELECT, UPDATE and DELETE in database by writing code to manage the student table in the database named gcbt. student table consist of following columns name,course,fee.
Feature of projects
The system shall be able to record student details : name,course,fee.
The system shall be able to retrieve the student details : name,course,fee.
The system shall be able to Edit and Delete the student details : name,course,fee .
[adToAppearHere]
First we have to import the sql namespace.
using System.Data.SqlClient;
After that we have to Establish the Database Connection
SqlConnection con = new SqlConnection("Data Source=KOBINATH-PC; Initial Catalog=gcbt; User Id=sa;
Password=admin123");
SqlCommand cmd;
SqlDataReader read;
SqlDataAdapter drr;
string id;
bool Mode = true;
string sql;

i have created bool variable Mode.
bool Mode = true;
if the Mode is true means allow to add the new records. Mode false means update the existing records.
Save Button
Save and Update Records done by same button.
 private void button1_Click(object sender, EventArgs e)
        {
            string name = txtName.Text;
            string course = txtCourse.Text;
            string fee = txtFee.Text;

            if(Mode == true)
            {
                sql = "insert into student(stname,course,fee) values(@stname,@course,@fee)";
                con.Open();
                cmd = new SqlCommand(sql, con);
                cmd.Parameters.AddWithValue("@stname", name);
                cmd.Parameters.AddWithValue("@course", course);
                cmd.Parameters.AddWithValue("@fee", fee);
                MessageBox.Show("Record Addddedddd");
                cmd.ExecuteNonQuery();

                txtName.Clear();
                txtCourse.Clear();
                txtFee.Clear();
                txtName.Focus();

            }
            else
            {
                id = dataGridView1.CurrentRow.Cells[0].Value.ToString();
                sql = "update student set stname = @stname, course= @course,fee = @fee where id = @id";
                con.Open();
                cmd = new SqlCommand(sql, con);
                cmd.Parameters.AddWithValue("@stname", name);
                cmd.Parameters.AddWithValue("@course", course);
                cmd.Parameters.AddWithValue("@fee", fee);
                cmd.Parameters.AddWithValue("@id", id);
                MessageBox.Show("Record Updateddddd");
                cmd.ExecuteNonQuery();

                txtName.Clear();
                txtCourse.Clear();
                txtFee.Clear();
                txtName.Focus();
                button1.Text = "Save";
                Mode = true;

            }
   con.Close();

}
View Records
public void Load()
        {
             try
             {
                 sql = "select * from student";
                 cmd = new SqlCommand(sql, con);
                 con.Open();
                 read = cmd.ExecuteReader();
                 dataGridView1.Rows.Clear();

                 while(read.Read())
                 {
                     dataGridView1.Rows.Add(read[0],read[1],read[2],read[3]);
                 }
                 con.Close();
             }
             catch(Exception ex)
             {
                 MessageBox.Show(ex.Message);

             }
 }
Edit and Delete
if you wish to edit or delete the records first have to click the edit or delete button of the particular row.
First Create the function getID .
 public void getID(String id)
         {
             sql = "select * from student where id = '" +  id + "'  ";
             cmd = new SqlCommand(sql, con);
             con.Open();
             read = cmd.ExecuteReader();

            while(read.Read())
            {
                txtName.Text = read[1].ToString();
                txtCourse.Text = read[2].ToString();
                txtFee.Text = read[3].ToString();
            }
            con.Close();
         }
[adToAppearHere]
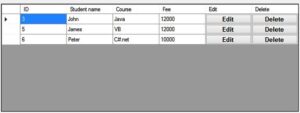
when the data load into the datagridview data loaded along with the edit and delete buttons.i attached the screen shot image below.

private void dataGridView1_CellContentClick(object sender, DataGridViewCellEventArgs e)
        {

            if(e.ColumnIndex == dataGridView1.Columns["Edit"].Index && e.RowIndex >= 0)
            {
                Mode = false;
                id = dataGridView1.CurrentRow.Cells[0].Value.ToString();
                getID(id);
                button1.Text = "Edit";

            }
            else if(e.ColumnIndex == dataGridView1.Columns["Delete"].Index && e.RowIndex >= 0)
            {
                Mode = false;
                id = dataGridView1.CurrentRow.Cells[0].Value.ToString();
                sql = "delete from student where id  = @id ";
                con.Open();
                cmd = new SqlCommand(sql, con);
                cmd.Parameters.AddWithValue("@id ", id);
                cmd.ExecuteNonQuery();
                MessageBox.Show("Record Deleteeeee");
                con.Close();
            }
  }
Clear Button
 private void button3_Click(object sender, EventArgs e)
        {
            txtName.Clear();
            txtCourse.Clear();
            txtFee.Clear();
            txtName.Focus();
            button1.Text = "Save";
            Mode = true;
        }
i have attached the video link below. which will do this tutorials step by step.