The Milk Rice shop Inventory Management System is developed by Java and mysql. java best practice is must if you interested in java.The project is built to manage sales and transactions. To make a new transaction, fields such as: Milk type, qty,price and payment needs to be selected. If you like to learn point of sales systems step by step, this is the right place to learn from the beginning.

In this tutorial, you will learn jasper reports step by step and designing the java print receipt.java coding practices is very important for us to grow the knowledge in java day by day.how to be a good programmer in the future. Let go and learn the java mini projects step by step.i have attached the complete project video also how the flow works step by step below.
In order to create the system we have used NetBeans IDE and Mysql database as a backend.
Features
- Point of Sales
- Stock Management
- Java Receipt
Learn how to make this System Step by step
The first step Create the database named with “milksystem “. then established the database connection to download the mysql connector in order to connect Java & mysql.if you don’t you have an idea about download the mysql connector you can follow this link.
To connect the database please refer the following code. To create the method name connect (); paste the below code inside to the Connect () method.
    public void Connect()
    {
        try {
            Class.forName("com.mysql.jdbc.Driver");
            con = DriverManager.getConnection("jdbc:mysql://localhost/milksystem", "root", "");
        } catch (ClassNotFoundException ex) {
            ex.printStackTrace();
        } catch (SQLException ex) {
            ex.printStackTrace();
        }
    }
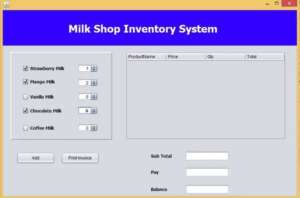
The system shall be able to select the relevant milk type.
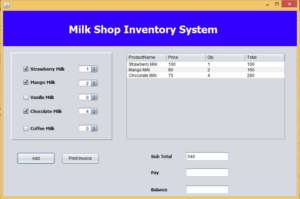
Add the Product details into the JTable
After selected the relavent Milk type the user has the option to add the qty by clicking the add button to see all Products details which will be shown in the below table.
Paste this code inside the add button
 private void jButton2ActionPerformed(java.awt.event.ActionEvent evt) {

        int sum = 0;
        int price;
        int qty;
        int tot = 0;

        if(chk1.isSelected())
        {
            String Strawberry = chk1.getText();
            price = 100;
            qty = Integer.parseInt(txt1.getValue().toString());

            tot = price * qty;
            model = (DefaultTableModel)jTable1.getModel();

            model.addRow(new Object[]
            {

            Strawberry,
             price,
             qty,
             tot
            });
        }

         if(chk2.isSelected())
        {
            String Mango  = chk2.getText();
            price = 80;
            qty = Integer.parseInt(txt2.getValue().toString());

            tot = price * qty;
            model = (DefaultTableModel)jTable1.getModel();

            model.addRow(new Object[]
            {

            Mango,
             price,
             qty,
             tot
            });
        }

           if(chk3.isSelected())
        {
            String Vanilla   = chk3.getText();
            price = 70;
            qty = Integer.parseInt(txt3.getValue().toString());

            tot = price * qty;
            model = (DefaultTableModel)jTable1.getModel();

            model.addRow(new Object[]
            {

            Vanilla,
             price,
             qty,
             tot
            });
        }

         if(chk4.isSelected())
        {
            String Chocolate   = chk4.getText();
            price = 70;
            qty = Integer.parseInt(txt4.getValue().toString());

            tot = price * qty;
            model = (DefaultTableModel)jTable1.getModel();

            model.addRow(new Object[]
            {

            Chocolate,
             price,
             qty,
             tot
            });
        }

        if(chk5.isSelected())
        {
            String Coffee   = chk5.getText();
            price = 60;
            qty = Integer.parseInt(txt5.getValue().toString());

            tot = price * qty;
            model = (DefaultTableModel)jTable1.getModel();

            model.addRow(new Object[]
            {

            Coffee,
             price,
             qty,
             tot
            });
        }


        for(int i=0; i <jTable1.getRowCount(); i++)
        {
            sum = sum + Integer.parseInt(jTable1.getValueAt(i, 3).toString());

        }

        txtsub.setText(Integer.toString(sum));


    }
Calculating the Total and balance

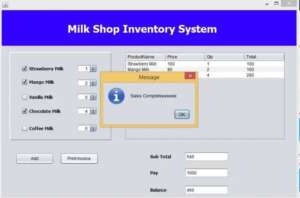
After that create the method Sales().we have to create two different tables to store data into the database.we also have to create the following tables from database.
sales tables consist of following colums – id,subtotal,pay,balance.
sales_products tables consist of following colums –id,sales_id,prodname,price,qty,total
public void sales()
    {

        String sub = txtsub.getText();
        String pay = txtpay.getText();

        String bal = txtbal.getText();
          int lastid = 0;

        try {
             String query = "insert into sales(subtotal,pay,bal)values(?,?,?)";
            pst = con.prepareStatement(query, Statement.RETURN_GENERATED_KEYS);
            pst.setString(1, sub);
            pst.setString(2, pay);
            pst.setString(3, bal);
            pst.executeUpdate();
            ResultSet rs = pst.getGeneratedKeys();

            if(rs.next())
            {
               lastid = rs.getInt(1);
            }

            int rows = jTable1.getRowCount();

            String query1 = "insert into sales_product(sales_id,prodname,price,qty,total)values(?,?,?,?,?)";

            pst1 = con.prepareStatement(query1);

            String prodname = " ";
             int price;
             int qty ;
            int total = 0;


            for(int i = 0; i<jTable1.getRowCount(); i++)
            {
                   prodname = (String)jTable1.getValueAt(i, 0);
                   price = (int)jTable1.getValueAt(i, 1);
                   qty = (int)jTable1.getValueAt(i, 2);
                   total = (int)jTable1.getValueAt(i, 3);


                   pst1.setInt(1, lastid);
                    pst1.setString(2, prodname);
                    pst1.setInt(3, price);
                    pst1.setInt(4, qty);
                    pst1.setInt(5, total);
                    pst1.executeUpdate();
            }


            JOptionPane.showMessageDialog(this, "Sales Completeeeeeee");

            HashMap a = new HashMap();
            a.put("invo", lastid);

            try {
                JasperDesign jdesign = JRXmlLoader.load("C:\\Users\\kobinath\\Documents\\NetBeansProjects\\MilkInventory\\src\\report1.jrxml");
               JasperReport jreport = JasperCompileManager.compileReport(jdesign);

               JasperPrint jprint = JasperFillManager.fillReport(jreport, a, con);


               JasperViewer.viewReport(jprint);


            } catch (JRException ex) {
                Logger.getLogger(Milk.class.getName()).log(Level.SEVERE, null, ex);
            }


        } catch (SQLException ex) {
            Logger.getLogger(Milk.class.getName()).log(Level.SEVERE, null, ex);
        }


    }
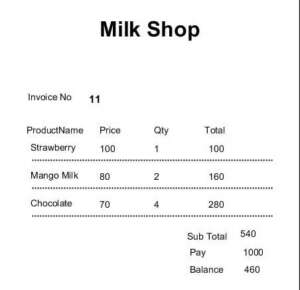
Call the Sales() method inside the Print Invoice button. after calculating the total Print receipt will be released. This print receipt designed by Jsper Reporting.
Paste this code inside the Print Invoice button
 private void jButton1ActionPerformed(java.awt.event.ActionEvent evt) {

        int sub,pay,bal;
         sub = Integer.parseInt(txtsub.getText());
         pay = Integer.parseInt(txtpay.getText());

         bal = pay - sub;

         txtbal.setText(String.valueOf(bal));

        sales();
    }

Print Recipt

I have attached the video tutorial below it will help you to do this step by step.java projects with source codes will help you to learn java.