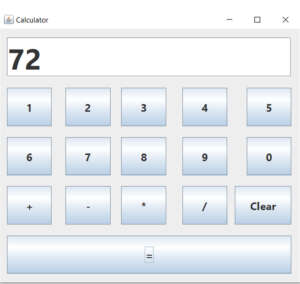
In this tutorials will teach how to make a calculator in java step by step. How to create the calculator in java swing application in best coding practice.
First Step
Declare the variables
String CalTotal;
int num1;
int num2;
String option;
int result;
You have to paste the below Codes 1 to 0 buttons
private void jButton1ActionPerformed(java.awt.event.ActionEvent evt) {

        CalTotal = txtTotal.getText();
        txtTotal.setText(CalTotal + "1");
    }

    private void jButton2ActionPerformed(java.awt.event.ActionEvent evt) {

          CalTotal = txtTotal.getText();
        txtTotal.setText(CalTotal + "2");
    }

    private void jButton3ActionPerformed(java.awt.event.ActionEvent evt) {

          CalTotal = txtTotal.getText();
        txtTotal.setText(CalTotal + "3");
    }

    private void jButton4ActionPerformed(java.awt.event.ActionEvent evt) {
        // TODO add your handling code here:
          CalTotal = txtTotal.getText();
        txtTotal.setText(CalTotal + "4");
    }

    private void jButton5ActionPerformed(java.awt.event.ActionEvent evt) {
        // TODO add your handling code here:
          CalTotal = txtTotal.getText();
        txtTotal.setText(CalTotal + "5");
    }

    private void jButton6ActionPerformed(java.awt.event.ActionEvent evt) {
        // TODO add your handling code here:
          CalTotal = txtTotal.getText();
        txtTotal.setText(CalTotal + "6");
    }

    private void jButton7ActionPerformed(java.awt.event.ActionEvent evt) {
        // TODO add your handling code here:
          CalTotal = txtTotal.getText();
        txtTotal.setText(CalTotal + "7");
    }

    private void jButton8ActionPerformed(java.awt.event.ActionEvent evt) {
        // TODO add your handling code here:
          CalTotal = txtTotal.getText();
        txtTotal.setText(CalTotal + "8");
    }

    private void jButton9ActionPerformed(java.awt.event.ActionEvent evt) {
        // TODO add your handling code here:
          CalTotal = txtTotal.getText();
        txtTotal.setText(CalTotal + "9");
    }

    private void jButton10ActionPerformed(java.awt.event.ActionEvent evt) {
        // TODO add your handling code here:
          CalTotal = txtTotal.getText();
        txtTotal.setText(CalTotal + "0");
    }
Paste the following codes to +,-,*,/ button
    private void jButton11ActionPerformed(java.awt.event.ActionEvent evt) {

        option = "+";
        num1 = Integer.parseInt(txtTotal.getText());

        txtTotal.setText("");

    }

    private void jButton12ActionPerformed(java.awt.event.ActionEvent evt) {
        // TODO add your handling code here:
         option = "-";
        num1 = Integer.parseInt(txtTotal.getText());

        txtTotal.setText("");

    }

    private void jButton13ActionPerformed(java.awt.event.ActionEvent evt) {
        // TODO add your handling code here:
           option = "*";
        num1 = Integer.parseInt(txtTotal.getText());

        txtTotal.setText("");

    }

    private void jButton14ActionPerformed(java.awt.event.ActionEvent evt) {
        // TODO add your handling code here:
           option = "/";
        num1 = Integer.parseInt(txtTotal.getText());

        txtTotal.setText("");

    }
Paste the following codes inside the = Button
    private void jButton15ActionPerformed(java.awt.event.ActionEvent evt) {

        num2 =  Integer.parseInt(txtTotal.getText());

        if(option.equals("+"))
            result = num1 + num2;

         if(option.equals("-"))
            result = num1 - num2;

         if(option.equals("*"))
            result = num1 * num2;

          if(option.equals("/"))
            result = num1 / num2;

          txtTotal.setText(result + "");
    }
Paste the following codes inside the Clear Button
 private void jButton16ActionPerformed(java.awt.event.ActionEvent evt) {

        txtTotal.setText("");
        result = (0);
        num1 = (0);
        num2 = (0);

    }
i have attached the video link below. which will do this tutorials step by step