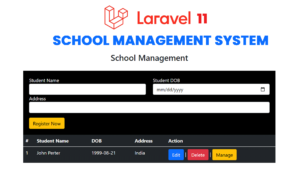
In this tutorial, we will teach you how to create a simple school management system using Laravel 11. This lesson primarily covers student registration and student records management.


Installing Laravel 11
Create the new project which name is schoolmanagment-app.type by following command to create the Laravel project.
composer create-project laravel/laravel schoolmanagement-app
After typing the command, wait until the project installation completes. Once it’s finished, let’s proceed with the database setup.
Change .env File
By Default Database Connection in Laravel 11 as Sqllite
By Default Connection
DB_CONNECTION=sqlite
# DB_HOST=127.0.0.1
# DB_PORT=3306
# DB_DATABASE=laravel
# DB_USERNAME=root
# DB_PASSWORD=
To change the MySQL connection, follow these steps:
- Set the connection type to MySQL.
- Enter the user credentials, including the database username and password.
- Specify the database name.
DB_CONNECTION=mysql
DB_HOST=127.0.0.1
DB_PORT=3306
DB_DATABASE=dbschoolmanagement
DB_USERNAME=root
DB_PASSWORD=
Run the Project
Run the Application using following command
php artisan serve
Create Migrations
In Laravel create the table called as Migration
Run the command to create the Migration
php artisan make:migration create_students_table
After that you can check the inside database folder migrations create_students_table file has been created
successfully.
Select and open the students table. add the following table fields empname,dob,phone
public function up(): void
   {
       Schema::create('students', function (Blueprint $table) {
           $table->id();
           $table->string('student_name');
           $table->date('dob');
           $table->string('address')->nullable();
           $table->string('status')->default('active');
           $table->timestamps();
       });

   }
After modified the columns names then run the migrate command to create the tables in the databases.before the run the
command please save project then run it.
php artisan migrate
Create Controller
php artisan make:controller StudentController
After created the controller paste this following code snippet
<?php

namespace App\Http\Controllers;

use Illuminate\Http\Request;
use App\Models\Student;
use App\Models\StuRecord;


class StudentController extends Controller
{

    protected $student;
    protected $stu_record;

    public function __construct(){

        $this->student = new Student();
        $this->stu_record = new StuRecord();

    }

    public function index(){

        $response['students'] = $this->student->all();
        return view('pages.student.index')->with($response);

    }

    public function save(Request $request){

        //dd($request->all());

        $this->student->create($request->all());
        return redirect()->back();

    }


    public function delete($student_id){

        $student = $this->student->find($student_id);
        $student->delete();
        return redirect()->back();

    }


    public function edit($student_id){

        $response['student'] = $this->student->find($student_id);
        return view('pages.student.edit')->with($response);
    }


    public function update(Request $request, $student_id){

        $student = $this->student->find($student_id);

        $student->update(array_merge($student->toArray(), $request->toArray()));
        return redirect('student');

    }


    public function vewRecords($stu_id){

        $response['student'] = $this->student->find($student_id);
        $response['stuRecords'] = $this->stu_record->where('student_id', $student_id)->get();

        return view('pages.student.manage')->with($response);
    }

    public function saveRecord(Request $request){

        $this->stu_record->create($request->all());
        return redirect()->back();
    }


}
After create the controller need to create the model.
Create Model
Model is used to get the data from the database.
Create the Model name which is Student
php artisan make:model Student
After Model is Created the look like this. Code inside Model Class (app\Models\)
Change it as like this
class Student extends Model
{
    use HasFactory;

    protected $fillable = [
        'student_name',
        'dob',
        'address',
        'status'

    ];
}
Create Views
inside the views folder
create layouts folder.inside the folder create a file app.blade.php. inside the file paste this following codes.
app.blade.php
    Student Management


    @yield('content')
inside the views folder . create the another folder pages inside this folder create two files which are edit and index pages.
index.blade.php
@extends('layouts.app')
@section('content')
School Management
@foreach ( $students as $key => $student )
@endforeach
#
Student Name
DOB
Address
Action
{{ ++$key }}
{{ $student->student_name }}
{{ $student->dob }}
{{ $student->address }}
|
|
@endsection
@push('css')
@endpush
edit.blade.php
@extends('layouts.app')
@section('content')
Student Management
@endsection
@push('css')
@endpush
Routes
Pages are Manage through routes. If you are crud system simple you can add it the routes one line look like this
 Route::get('/', [StudentController::class, 'index'])->name('student');
    Route::post('/save', [StudentController::class, 'save'])->name('student.save');
    Route::get('/{stu_id}/delete', [StudentController::class, 'delete'])->name('student.delete');
    Route::get('/{stu_id}/edit', [StudentController::class, 'edit'])->name('student.edit');
    Route::post('/{stu_id}/update', [StudentController::class, 'update'])->name('student.update');