Up next in 10

Unlock the full power of Gemini AI with this easy step-by-step guide! 🚀
In this video, I’ll show you how to use Gemini AI for content creation, smart prompts, research, and more. Whether you're a beginner or already familiar with AI tools, this tutorial will help you create powerful Gemini AI prompts that deliver amazing results.
We’ll also explore the latest features of Google Gemini 3, how it compares to older versions, and how you can use it to boost productivity, generate ideas, write faster, and create high-quality content with just a few lines of text.
🔥 What you’ll learn:
✔️ How to use Gemini AI effectively
✔️ Best prompt techniques for Gemini AI
✔️ Real examples and use cases
✔️ What’s new in Google Gemini 3
✔️ Tips to get better results every time
If you found this video helpful, don’t forget to like, share, and subscribe for more AI tutorials! 💡
#GeminiAI #HowToUseGeminiAI #PromptGeminiAI #GoogleGemini3 #AITools #GeminiTutorial
Show More Show Less View Video Transcript
0:00
Hi friends, welcome to tutor sun
0:02
channel. Today I'm going to reveal the
0:04
craft of Google Gemini. Okay, so when
0:08
you go to the Google and type G uh
0:11
Gemini AI, click on it here uh if you
0:15
have a Gmail account, you will be able
0:17
to sign up via the Gmail account. Okay,
0:20
so you will be able to get this uh chat
0:23
box window or Geminina. So you can ask
0:26
any doubt regarding your program. uh if
0:29
you are a programmer you can ask any
0:31
doubts. Okay. So this tool is now very
0:34
good tool for a programmer any kind of a
0:39
uh things. Okay. So uh I'm going to ask
0:42
the doubt regarding my programming. So I
0:45
want to act as you can give the font act
0:48
as
0:51
world best
0:55
world PHP developer.
1:02
Okay. So here you can see
1:06
it will be generating the full
1:07
architecture of PHP development. what is
1:10
the framework uh the that industry using
1:12
right now and that database what is
1:15
using right now so best securities and
1:19
uh this yeah I implemented that uh cloud
1:22
pipeline as well so I need to
1:27
write the code
1:30
for
1:32
uh
1:34
save the
1:36
registration
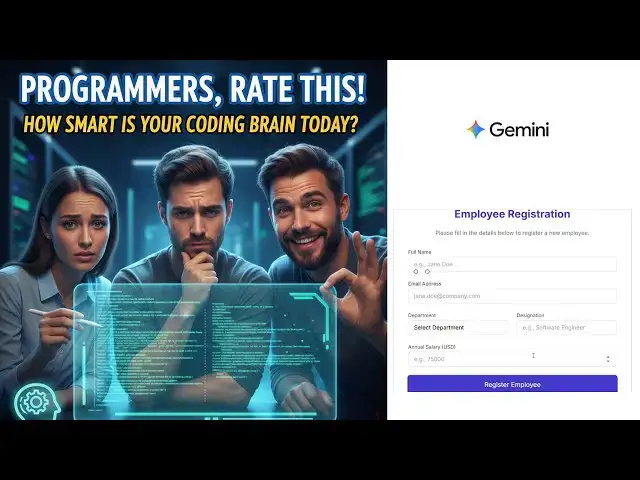
1:45
So employee registration
1:50
employee registation
1:54
using
1:56
PHP MySQL.
1:59
Now the latest technology which is a uh
2:03
jQuery AEX.
2:10
Okay. So nowadays the when you are
2:13
connect with PHP MySQL you have to use
2:16
jQuery and along with Ajax because uh
2:19
that we can without reloading the page
2:22
we have to use JSON AEX. This is a very
2:25
best technology adjax which nothing but
2:27
the JSON format to get the data. Okay.
2:31
So let's do it. You can see how the
2:35
codes are working. So it's writing the
2:37
code for the employee registration form
2:40
client side. Okay. So here it generate
2:42
the fully page. So this is a completely
2:47
page. You can have it. You can see that
2:50
select the this everything it's still
2:53
writing. Okay. So the simple here simple
2:57
employee registration form you can go uh
2:59
you can have it along with the preview
3:02
as this is a window. This a code
3:06
you can see the client side. You can see
3:08
this uh the form that uh message area
3:12
the submit uh submit. Okay. So this
3:14
every validation also is this
3:16
implemented.
3:19
Okay. So the a request
3:22
employee registration successfully. So
3:24
this a timeout and everything is there.
3:28
Okay. So this things are there. So if
3:30
you want to I want to
3:33
connect
3:35
with
3:37
MySQL
3:39
back end
3:41
for this form.
3:47
I need you to generate the code.
3:53
Now you can see at the same time we can
3:58
do the they implement the back end as
4:03
here. So back end also they have to
4:05
implement the code.
4:07
So the back end connections and
4:09
everything here post that uh how the
4:11
fields are email department extension
4:14
salary is a JSON request. So that's
4:17
everything is implemented.
4:20
So that is a very best tool here. Okay.
4:22
So that's that's why we have to
4:23
implement the client side open the
4:25
client side and test that. Okay. So here
4:28
the completely uh here they are separate
4:32
the part as well. The one is this this
4:36
one should should be the uh front end.
4:39
This is should be the back end. If you
4:41
open the back end side you will be able
4:43
to see the back end here. The database
4:45
creations for the MySQL.
4:48
It simply define the ID as auto
4:50
increment part and unique primary key
4:52
and the respective fields.
4:55
Okay. So back end script how to write
4:58
the back end you have to write the
5:00
employee registration php you have to
5:01
implement the page. So here we have to
5:04
write the database configuration out
5:07
should be the professionally we have
5:08
configure the database connections. Okay
5:10
the connectivity you have to write the
5:12
PDO formats.
5:14
Okay. So that's advanc part we have to
5:16
implement right so that uh so here
5:20
everything the response is going the
5:22
registration
5:24
successfully here this how the databases
5:26
data code is added using the prepare
5:27
statement insert into name this also the
5:30
prepare statement this is the efficient
5:32
way to store the data here what is the
5:33
data coming it will be assigning and set
5:36
the feed input field like this here the
5:39
full thing it did telling it of this
5:43
simple
5:44
AI code.
5:46
Okay, this is a client side. Client side
5:48
also you will be a if you have a look uh
5:50
employee registration here things are
5:52
detailing X. If you this is a preview
5:54
this a code view. If you go to the G
5:56
code view you can go to that all the
5:57
fields one by one. This is a form field.
6:01
Okay. This a form field look of the form
6:04
field. Uh look this is the client side
6:07
validation which is connect with the
6:08
jar.
6:10
Uh the form the form which is a name
6:12
nothing but a form
6:16
employee form we have to implement it
6:18
over here the message area this all the
6:20
fields after that that uh we have make
6:23
some client side validation as well.
6:26
Okay, here this this way we are sending
6:28
the data after you are filling the form.
6:31
This form
6:33
click registration it goes to the v it
6:36
will be accessing to that uh code. Okay,
6:40
this go to over here. Okay. So you have
6:43
to provide the data. So that you this
6:46
registration URL mean you have to put
6:47
into this page registration do this page
6:51
name with the page name you have to
6:54
write it here. Employee registrations
6:57
here register employee.ph this page name
7:00
we have to put it over here.
7:09
Okay. So the database uh the data will
7:12
be goes to that respective field and add
7:15
the data into the database. Okay, that's
7:17
how that's that's the things we have to
7:18
you have to implement it over here
7:21
registration.php.
7:23
Okay, so when you fill the data it's
7:25
called this particular URL along with
7:28
the post method form data mean this is
7:30
all the form data
7:33
from the form all the form data which
7:35
will be goes to here. Okay. The form
7:40
data the form data I mean here this form
7:43
is a data form data
7:46
this all the form which will be here the
7:48
form a form but the completely form you
7:51
have to assign to this variable. This
7:52
complete form you have to serialize and
7:54
put into this form data variable you're
7:57
sending to as a JSON format. Data is
7:58
also JSON format. If all success it is
8:01
added to the registration successfully
8:05
otherwise registration file. Okay. If
8:07
the error implementation everything it
8:10
it it will be implemented from the
8:12
scratch. Okay. Here the JavaScript
8:14
jQuery AEX implementation online. Okay.
8:17
This is the simple way to we are
8:19
handling the
8:21
client side scripting. Okay. The
8:23
JavaScript all the JavaScript this is a
8:25
form. Okay. If you have this is a very
8:27
essential stuff we need to learn. Okay.
8:31
So everything it will be detailing
8:32
explained. Okay. This is a form we will
8:34
I'll be teach you the step by step.
8:36
Don't worry about that. Okay. Uh at the
8:39
moment you can see this Gemini is very
8:42
good AI tool for programmers to learn.
8:45
Thank you for watching.
#Programming
#Jobs & Education