Up next in 10

🌦️ Build a Weather Forecast App Using HTML, CSS & JavaScript | Step-by-Step Tutorial
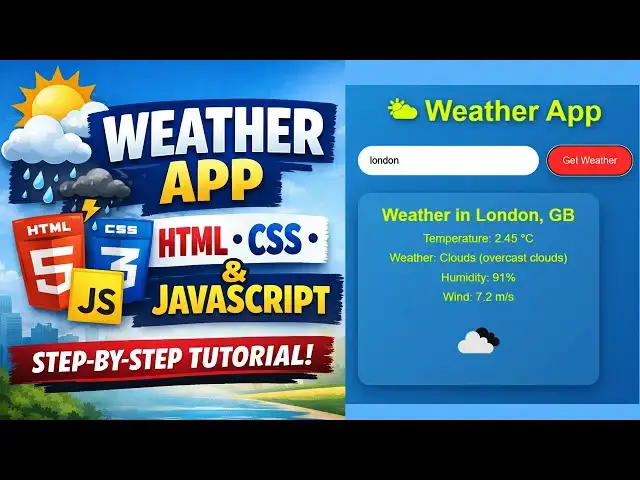
Want to create a real-time weather app from scratch? In this video, you’ll learn how to build a Weather Forecast App using HTML, CSS, and JavaScript, powered by the OpenWeatherMap API.
This beginner-friendly project shows you how to fetch live weather data, display temperature, humidity, and weather conditions, and design a clean, responsive UI using pure HTML & CSS—no frameworks needed!
🔥 What you’ll learn in this video:
✔️ How to create a weather app using HTML, CSS, and JavaScript
✔️ Fetch real-time weather data using OpenWeatherMap API
✔️ JavaScript API integration made simple
✔️ Build a responsive and modern weather forecast UI
✔️ Perfect project for beginners & portfolio showcase
🚀 This weather forecast app using JavaScript is ideal for students, beginners, and anyone looking to strengthen their frontend development skills with a real-world project.
#weatherappusinghtmlcssandjavascript #weatherforecastappusinghtmlcssandjavascript
#weatherforecastappusinghtmlcss
#openweathermapapijavascript
#weatherforecastappusingjavascript
Show More Show Less View Video Transcript
0:00
Hi friends, welcome to tutors funny
0:02
channel. Today I'm going to teach about
0:04
the weather app. Okay. So how to
0:08
implement this weather app using HTML
0:11
and CSS. This is very professional
0:13
weather app. You can see this is a nice
0:15
user interface. So I'll be provide the
0:18
so along with the source code. So the
0:20
simple code you will be able to see here
0:22
this city. You can enter whatever city
0:23
you need to enter the country as you
0:26
just enter the city. You will be able to
0:29
uh get the weather information. You can
0:32
I I am going to enter the city as
0:34
Chennai. Click weather information here.
0:38
The Chennai which is belongs to India.
0:41
This is a current weather is this. Okay.
0:43
This all the information
0:46
all the in respect information will be
0:48
displayed like this. Okay. So this is a
0:51
candi which is a it is based on Sri
0:53
Lanka here. Now this is a cloudy clouds
0:57
the according to the city you are uh
1:00
entered over here according to the cl
1:04
weather condition also show as a symbol
1:08
as that is that professional way to
1:10
implement that system very simple okay
1:13
whatever country so if you are you can
1:15
see here I am going to use Switzerland
1:18
city something like that squirish city
1:20
something else Geneva whatever see you
1:24
can select of Geneva.
1:26
It is a US based. You will be able to
1:28
see the uh city. So here this one should
1:31
be a our city quish
1:37
which is a which is a Switzerland. Okay.
1:40
So see Switzerland.
1:43
Okay. So you can say temperature and
1:44
cloudy broken clouds. Okay. So that's
1:46
how you have to work the
1:49
uh broken clouds. Here the icon has been
1:51
changed as a broken clouds. Okay. So
1:54
this how it should be works. Okay, you
1:57
can see this how this should be works.
1:59
Okay, so very simple way to implement
2:02
the system. Let's see how it work. Okay,
2:06
now first before you can diving into
2:09
that site what you're going to do is you
2:12
go to that
2:14
feather app respective website. Go and
2:17
visit here. You must create the account.
2:20
Okay, I already create the account. You
2:22
have to create the account. That's a
2:23
simple way you have to enter your name,
2:25
email address, all the things. After
2:28
that, after you have enter the email
2:30
address and click save uh register the
2:34
email is coming to the email box, you
2:37
just click enter uh click that link. If
2:40
you apply that your site has been
2:42
approval, it's coming like this. Okay.
2:45
So here what you going to do is here you
2:47
go to that current. This is you can go
2:50
to that current. So that you can if you
2:52
go and find it here is official website.
2:56
If you go here come to this website.
2:58
Okay. So here you will be able to find
3:00
the your API. So API key is generated
3:03
over here. Here can go click on it.
3:09
Okay. So here you will be able to see
3:12
the
3:14
uh here this one current weather. So
3:17
click on the current.
3:20
So you can get it here the APIs. These
3:23
are the API we have get it there. Okay.
3:25
So there there are uh there are several
3:29
methods are there. It's a it's a we
3:32
country here is a country and city all
3:35
things we are getting here the country
3:36
along with the city along with London
3:39
country and city all are coming look
3:41
like this. This how we can get the
3:43
weather information city only city city
3:45
ID. There are several uh API
3:49
uh methods are there. You can pick up
3:51
one of these out of this. Okay, you can
3:54
just go and uh get it one of these.
3:57
Okay, so Excel, ML and JSON format also
4:00
they are included. So now what I'm going
4:02
to do is
4:04
so this is the current one I already
4:08
show you the uh code as well. All the
4:10
very important stuff is you have to find
4:12
the API. So they go to the API
4:16
and not here you can go to that your
4:18
account here this your account my API
4:21
keys.
4:23
Okay here I already created API keys
4:25
once you coming here you have to create
4:26
the API keys here this API keys it
4:28
automatically generate this key you have
4:31
to put it here. This key is important
4:34
that you can just not of it and you can
4:37
uh use it. Okay. So just not of it this
4:40
key here. This is very important stuff.
4:42
Without this key we can't do it. It
4:44
won't work in my one. Okay. So you have
4:46
to try it your account. Okay. So you
4:49
have to create API key. After that this
4:51
is a simple code I have tried it. So
4:53
this is a simple design. Here I have a
4:56
create the div class. You close it. This
4:59
is app container which is nothing but
5:01
the style app container. So it's a body
5:04
have this a body have popins which is a
5:07
font text align center padding and
5:10
background everything I implemented.
5:12
Okay. So this is the heading adding text
5:15
mean this heading text we have to
5:17
generate in professional way. This is
5:19
where okay. So the adding text after
5:22
that these are the all the relevant
5:24
styles are getting done by the CSS. This
5:27
all the code I'll provide you don't
5:29
worry. Okay. This all source codes.
5:31
Okay. So after that what you're going to
5:33
do is here go to the JavaScript. So the
5:35
main here I'm go you have to implement
5:38
the JavaScript as well. Here this is
5:40
design JavaScript file JavaScript file
5:43
you have to implement the API keys my
5:45
key.
5:48
Okay my key I have implemented I I show
5:51
I I already shown where we are going to
5:53
implement the API key. After that you
5:56
can uh assign functions. Here's the
5:58
assign function. You have to select
5:59
select the create the assign function is
6:01
the get there. After that what is city
6:04
or enter on the particular text field is
6:06
field click click okay but enter enter
6:10
the city city is passing to this
6:11
particular variable if the city is not
6:14
enter it is uh please enter the city and
6:17
return okay if the city is enter it goes
6:20
to the particular URL here this is the
6:23
URL which I'm getting from that I
6:25
already showing my APIs I already show
6:30
here that current the here this is the
6:33
doc I have I have got this is the doc I
6:37
got the details from that this is the
6:40
documentation I I read and get that and
6:43
implemented over here okay so that city
6:46
and API keys okay you have created two
6:48
variables and one cities and API keys
6:51
the API keys are there it should it must
6:53
be valid key okay it must be valid key
6:56
then only it should you will be able to
6:58
work it's not valid so it won't work
7:00
right so city what's the CO I entered
7:02
here okay what the city entered here
7:04
according the city that uh you are focus
7:06
on that particular city the weather
7:08
information will be displayed okay so
7:10
after that here the response it fetch
7:13
this URL and you can generate the output
7:16
as a JSON format okay the JSON format
7:20
when city entered here it goes to that
7:23
along with this website it will be
7:25
display that weather forecast okay if
7:29
there's any problem is display that data
7:31
just display any error is city not found
7:34
API okay so that's the thing you have to
7:36
write it after that here another
7:38
function you have created name country
7:40
your name and country main temperature
7:42
and humidity weather wind speed every
7:45
details you have to get there okay once
7:48
the once you once you put in that one so
7:51
all the information will be completed
7:53
coming from that particular the city
7:55
where you enter okay if it is the
7:58
example if you enter the UT
8:00
UK UK the UK there is a England is a
8:05
city the based sorry the UK is a city so
8:08
that based on the city what is the
8:11
temperature humidity weather and current
8:14
now wind speed all the information will
8:17
be displayed over here. Okay. So that
8:20
information we have to get it as we have
8:22
to pass it as in HTML as a
8:26
uh JavaScript. After that what I'm going
8:29
to say we need to implement icon as well
8:31
here weather icon weather information
8:34
along with the icon along the icon also
8:36
that APIs can uh implemented it's very
8:40
simple so that this simple
8:44
CSS sty okay display so here the weather
8:47
display mean here the weather display
8:49
here our weather is displayed that is
8:51
the here what is the
8:55
city I entered here according to the
8:56
city the this style should be coming
8:58
from here.
9:01
Okay. This ID, this ID should be here.
9:06
Okay. So that's
9:09
this a mouse over everything here. Every
9:13
style should be implemented. So this
9:15
code the complete code I will given you.
9:19
You have to go through that that code
9:21
and you will be able to generate. So
9:23
here we have to provide the API code.
9:25
Not this code. You don't try out this
9:27
code. It won't work. You have try on it
9:29
your own one. Okay. Then only that work.
9:31
Okay. So you have try on your your own
9:33
one. Then only it should be work. Okay.
9:35
So you have to go and create the account
9:36
and you implement the API keys. Okay. So
9:40
thank you for watching. If you have any
9:41
doubts you let me know. Thanks for
9:43
watching.