Up next in 10

Do you want to learn how to organize Spring Boot projects? This video breaks down the Spring Boot folder and file structure in order to help you create scalable applications.
Learn how to structure your Spring Boot projects for:
Efficient Spring Boot with MySQL
Spring Boot REST API : A clean and modular Spring Boot .
Spring Initializr allows for a seamless setup.
This is the essential guide for understanding how to build a real Spring Boot project, whether you are a beginner or an intermediate developer.
Topics covered: Spring Boot folder structure Spring Initializr Setup controller, service, repository layer Spring Boot CRUD example REST API with MySQL integration
Subscribe to our Spring Boot Tutorials and don't forget your likes, shares, and subscriptions!
#SpringBoot #SpringInitializr #SpringBootCRUD #SpringBootRESTAPI #MySQL #JavaDeveloper #SpringFramework
Show More Show Less View Video Transcript
0:00
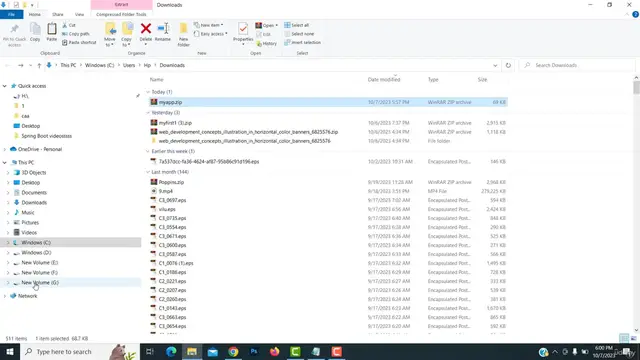
hi welcome back in our last video we saw
0:04
how to generate the springboard
0:06
application project we have downloaded
0:10
the generated project we have downloaded
0:13
this project zip file i am going to copy
0:20
and put it to my favorite drive so you
0:24
can select whatever drive you want so
0:26
I'm going to put into my G drive
0:30
i'm going to paste paste on here
0:34
so here this is my
0:37
now this zip file I'm going to make it
0:42
as a normal folder so I'm I want extract
0:46
this so if you are not install the
0:48
vinear software you must install then
0:52
only if you right click on this folder
0:55
you can see here this option will be
0:57
there
0:58
so I'm going to extract files
1:02
click okay now here this file now
1:06
extracted well it become a normal folder
1:11
so if you double click here inside this
1:15
folder we have a Maya this file we have
1:18
to open on the Intel J idea we have to
1:22
open on the Intel J so let me
1:27
I'm going to open up my IntellJ idea app
1:31
this is the editor where I use to write
1:34
the spring boot application this is a
1:37
professional editor for writing the Java
1:40
application books
1:42
now I'm going to open up my project into
1:46
my Intel idea app so what you're going
1:49
to do is go to the file
1:53
open option
1:55
here you have to select where file is
1:58
resided here you can selected where your
2:00
file is resided so my my file is resided
2:04
on on the G drive
2:08
so I'm going to go to the here this is
2:10
your all the uh folder is show your all
2:14
the drives
2:16
here I have put into my G drive so
2:18
select the G drive click on this arrow
2:20
to expand it so what is the name of your
2:23
project you have to select my app so you
2:26
have to you have to select as my app
2:30
here this is a my here some my app this
2:33
is my project my app click on here don't
2:36
open this one okay this is this is this
2:39
folder you don't open it here go inside
2:41
here inside you can see here this is
2:44
this is our
2:46
uh project inside this folder we have
2:49
another folder which is a maya that
2:51
folder you have to open it you must open
2:54
that folder don't open that folder
2:56
inside this may my folder there will be
2:58
another folder called with maya you open
3:02
this folder inside this folder all the
3:05
project is there click okay first
3:09
project I'm going to open defeat now you
3:13
have to wait until all the you can see
3:15
the taskbar all the dependency what are
3:17
the dependencies are selected all the
3:19
dependency will be installed
3:22
right you have to wait okay here you can
3:24
see this all the things will be
3:26
installing you have to wait okay it
3:28
installed successfully here you can see
3:31
this is your
3:33
folder structure you can see
3:37
I hope you guys you understood well I'll
3:40
see in my Next
3:44
hi welcome back in our last video we saw
3:48
how to generate the Spring Boot
3:50
application project we have downloaded
3:53
the generated project we have downloaded
3:57
this project zip file i am going to copy
4:04
and put it to my favorite drive so you
4:08
can select whatever drive you want so
4:10
I'm going to put into my G drive
4:14
i'm going to paste paste on here
4:18
so here this is my
4:21
now this zip file I'm going to make it
4:25
as a normal folder so I'm I want extract
4:30
this so if you are not install the
4:32
vinear software you must install then
4:36
only if you are right click on this
4:38
folder you can see here this option will
4:41
be there so I'm going to extract files
4:46
click okay now here this file now
4:50
extracted well it become a normal folder
4:55
so if you double click here inside this
4:59
folder we have a Maya this file we have
5:02
to open on the Intel J idea app you have
5:06
to open on the IntelJ
5:09
so let me
5:11
I'm going to open up my IntelJ idea app
5:15
this is the editor where I used to write
5:18
the Spring Boot application this is a
5:21
professional editor for writing the Java
5:24
application
5:26
now I'm going to open up my project into
5:30
my Intelli idea app so what you're going
5:33
to do is go to the file
5:36
open option
5:39
here you have to select where file is
5:42
resided here you can select it where
5:44
your file is resided so my my file is
5:47
resided on on the G drive so I'm going
5:53
to go to the here this is your all the
5:56
uh folder is show your all the drives
6:00
here I have put into my G drive so
6:02
select the G drive click on this arrow
6:04
to expand it so what is the name of your
6:07
project you have to select my app so you
6:10
have to you have to select as my app
6:14
here this is a my here some my app this
6:16
is my project my app click on here don't
6:20
open this one okay this is this is this
6:22
folder you don't open it here go inside
6:25
here inside you can see here this is
6:28
this is our
6:30
uh project inside this folder we have
6:33
another folder which is a Maya that
6:35
folder you have to open it you must open
6:38
that folder don't open that folder
6:40
inside this Maya folder there will be
6:42
another folder called Maya you open this
6:46
folder
6:47
inside this folder all the project is
6:50
there click okay trust project i'm going
6:55
to open up this window now you have to
6:57
wait until all the you can see the
6:59
taskbar all the dependency what are the
7:01
dependencies are selected all the
7:03
dependency will be installed
7:06
right you have to wait okay here you can
7:08
see this all the things will be
7:10
installing you have wait okay it
7:12
installed successfully here you can see
7:15
this is your
7:17
folder structure you can see
7:21
I hope you guys you understood well I'll
7:24
see my next leure
7:28
Hi welcome back in our last video we saw
7:32
how to open the project into IntelJ idea
7:37
let's continue the video so here this is
7:41
my project name my app you can see here
7:44
this is the name which we given in our
7:48
spring boot application so this is the
7:50
name we have given while view while
7:53
configure the project
7:55
here you can say inside the project you
7:57
can see here there will be the folder
7:59
which is src
8:01
inside the src folder you can see here
8:03
the main folder let me expand the main
8:07
folder
8:09
we have two different file one is a Java
8:13
another one is a resources you can see
8:15
here if you expand the Java folder you
8:19
can see here com
8:22
spring boot class my this is the package
8:26
we created here this is the package we
8:29
created inside the Java folder there's a
8:32
package has been created com springboard
8:36
class do my
8:39
this is a package name we have
8:40
configured uh while we configuring the
8:42
project we big name
8:46
inside this package
8:48
there will be the class which will be
8:50
created defaulting my app application if
8:53
you double click and open up here inside
8:57
this class we have a main method you can
8:59
see the main method public static vid
9:04
main this is the main method will be
9:05
created that's it
9:08
right after that you can see here there
9:13
will be the another folder which is a
9:16
resources
9:19
this resources folder if you expand it
9:22
you can see here there are two various
9:24
folders static and templates
9:28
there is another important file which is
9:30
application.properties
9:33
this file which will be used to
9:36
configure the database connection we'll
9:41
we'll see in our next video how to
9:44
configure the database connection how to
9:47
create the database all the thing we
9:49
will be discuss in my next video right
9:53
now let's look at that another important
9:56
file you can see here there is a com.xml
10:01
xml
10:03
this is a very essential file of the
10:06
Spring Boot application
10:10
if you open up this file you can see
10:13
here the dependencies you can see the
10:16
dep area called dependencies what this
10:20
all things are uh string configuration
10:23
what are the configuration you are did
10:25
while you creating the generate the
10:27
spring boot application project here you
10:29
can see here is a package
10:32
artificate ID here what is the version
10:35
all the things are here Java version
10:37
what version you are selected all the
10:40
things are there after that you can see
10:42
here there is a section called
10:44
dependencies
10:46
dependencies we have we have added the
10:49
three dependencies while we generate the
10:52
spring boot application those are JPA
10:56
MySQL connector
10:58
and web you can see here
11:02
this is a JPA dependencies
11:05
this is a web dependency this is a MySQL
11:10
connector dependencies the the three
11:14
dependencies you can select here there
11:16
are three dependencies is there you can
11:19
see here if you want to add more
11:22
dependency you have to add it here
11:25
inside this in this in inside this
11:29
dependencies here if you want to add any
11:31
other dependencies you can add it over
11:33
here later we will see how to add the
11:37
dependencies
11:39
i hope you guys you understood the
11:40
things well i'll see in my next session
11:44
thank you
11:47
hi welcome back in this video I'm going
11:51
to teach how to add the dependencies
11:55
so here imagine you have to forget to
11:58
add the dependency as MySQL connector so
12:01
how to add the dependencies so you go to
12:03
the Google
12:06
you have to type mvn
12:11
mvn maven okay maven you have to type
12:15
MySQL connector
12:19
connector press enter key on your
12:22
keyboard here you can see here there is
12:25
a website which name is Maven
12:28
repository
12:30
click on this first link
12:34
it will take you to this page for
12:37
getting the dependency you can see the
12:39
dependencies here there are many
12:41
dependencies there now you can see don't
12:43
select as the first one to this ones
12:47
okay you have to select as below version
12:49
so here you can select this uh so here
12:52
will be selected this okay here you have
12:54
selected this right 8.0.20
12:58
20 you have select this one okay you can
13:00
select one of these what a problem no
13:02
problem you can I have selected this
13:05
you can see here
13:07
here some me here you can select the me
13:10
dependency you will be able to select
13:11
here yeah you can select it here the
13:15
dependencies so here how to add the
13:18
dependencies so here I'm going to remove
13:20
this MySQL connect dependency
13:25
i have remove it so after remove I'm
13:28
going to apply here the me whatever
13:30
changes you are delete in the home.xml
13:32
XML file it ask to it if you have to
13:37
click this button to ch load the changes
13:41
to update if you click on this the
13:43
changes will be applied here now the
13:45
changes will be appeared the changes
13:46
will be app right now I'm going to add
13:50
this one so here this one what I'm going
13:53
to do is I just copy it select
13:57
I'm going to select it copy right click
14:01
copy back to my int idea form.xml file
14:05
you have to paste inside this
14:06
dependencies
14:09
okay I'm going to paste inside the
14:10
dependency i'm going to paste it that's
14:13
it i paste it after paste it don't
14:16
forget to click on this button you have
14:19
to you must click on this button to
14:22
apply the changes then only the changes
14:24
will be applied in your project
14:27
if you are if you are not if you forget
14:29
it it it won't apply it won't work so if
14:33
you click on this now you can see the
14:35
dependencies this dependency applied
14:38
okay now the dependency has been applied
14:40
perfect right now here dependency has
14:43
been applied successfully this you have
14:46
applied the dependencies if you once you
14:48
forget the dependencies you have to uh
14:51
apply the dependency you have to get the
14:52
dependency like this
14:56
okay so this how we have get the
14:58
dependency i hope you understood the
15:01
things well there is a site which is a
15:03
man repository
15:06
thank you for watching i'll see you in
15:09
my next lecture thank you