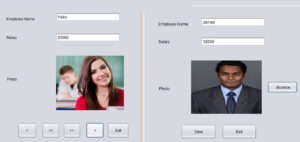
This tutorial will teach you Records Navigation with image using Java and Mysql.i will teach step by step with in this tutorial which will help you in your future projects.

functional requirements
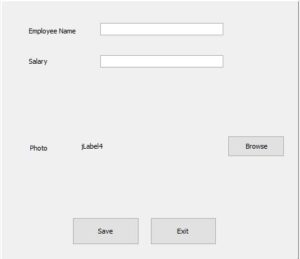
- User shall be able to register the employee details along the image.
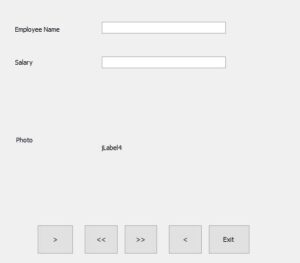
2. User shall be able to navigate the employee details along the image.
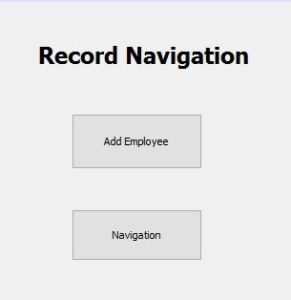
[adToAppearHere]Main
it has two buttons employee registation and navigation.

1.if you want to register the new employee click Add Employee.
2.if you want check the existing employee details click navigation button.
    private void jButton1ActionPerformed(java.awt.event.ActionEvent evt)
   {
        emp e = new emp();
        e.setVisible(true);
    }
    private void jButton2ActionPerformed(java.awt.event.ActionEvent evt)
   {
        empnav n = new empnav();
        n.setVisible(true);
    }
Employee Registation

you must create the following object and variables
String path = null;
Connection con;
PreparedStatement pst;
byte[] userimage = null;
Browse the Image
 JFileChooser picchoose = new JFileChooser();
 picchoose.showOpenDialog(null);
 File pic = picchoose.getSelectedFile();


 path = pic.getAbsolutePath();
 BufferedImage img;
  try {
        img = ImageIO.read(picchoose.getSelectedFile());
        ImageIcon imageic = new ImageIcon(new ImageIcon(img).getImage().getScaledInstance(250,250,Image.SCALE_DEFAULT));
        imagelabel.setIcon(imageic);


         File image = new File(path);
         FileInputStream fis = new FileInputStream(image);
         ByteArrayOutputStream bos = new ByteArrayOutputStream();
         byte[] buff = new byte[1024];


          for(int readNum; (readNum=fis.read(buff)) !=-1;)
          {
                bos.write(buff,0,readNum);
          }

           userimage = bos.toByteArray();

        } catch (IOException ex) {
            Logger.getLogger(emp.class.getName()).log(Level.SEVERE, null, ex);
        }
Save Button
 String empname = txtname.getText();
 String salary = txtsal.getText();


        try {
             File image = new File(path);
             FileInputStream fis = new FileInputStream(image);
             Class.forName("com.mysql.jdbc.Driver");
             con = DriverManager.getConnection("jdbc:mysql://localhost/empnav","root","");
             pst = con.prepareStatement("insert into records(empname,salary,photo)values(?,?,?)");
             pst.setString(1, empname);
             pst.setString(2, salary);
              pst.setBytes(3, userimage);
              pst.executeUpdate();
              JOptionPane.showMessageDialog(this, "Record Adddedddddd");


        } catch (ClassNotFoundException ex) {
            Logger.getLogger(emp.class.getName()).log(Level.SEVERE, null, ex);
        } catch (FileNotFoundException ex) {
            Logger.getLogger(emp.class.getName()).log(Level.SEVERE, null, ex);
        } catch (SQLException ex) {
            Logger.getLogger(emp.class.getName()).log(Level.SEVERE, null, ex);
        }
Exit Button
this.setVisible(false);
Navigation Form

you must create the following object and variables
String path = null;
Connection con;
PreparedStatement pst;
Statement stat = null;
ResultSet rs;
Establish the database Connection
 public void Connection()
   {

        try {
            Class.forName("com.mysql.jdbc.Driver");
             con = DriverManager.getConnection("jdbc:mysql://localhost/empnav","root","");
             stat = con.createStatement(ResultSet.TYPE_SCROLL_SENSITIVE, ResultSet.CONCUR_READ_ONLY);


            rs = stat.executeQuery("select empname,salary,photo from records");

        } catch (ClassNotFoundException ex) {
            Logger.getLogger(empnav.class.getName()).log(Level.SEVERE, null, ex);
        } catch (SQLException ex) {
            Logger.getLogger(empnav.class.getName()).log(Level.SEVERE, null, ex);
        }
   }
Call the Connection inside the Constructor of class
    public empnav() {
        initComponents();
        Connection();
    }
First >
 try
        {
            rs.first();
              txtname.setText(rs.getString(1));
              txtsal.setText(rs.getString(2));


              Blob blob1 = rs.getBlob("photo");
              byte[] imagebyte = blob1.getBytes(1, (int)blob1.length());

              ImageIcon imageic = new ImageIcon(new ImageIcon(imagebyte).getImage().getScaledInstance(250,250,Image.SCALE_DEFAULT));

              imagelabel.setIcon(imageic);

        } catch (SQLException ex) {
            Logger.getLogger(empnav.class.getName()).log(Level.SEVERE, null, ex);
        }
[adToAppearHere]
Previous <<
try {
            if(!rs.isFirst())
            {

             rs.previous();
              txtname.setText(rs.getString(1));
              txtsal.setText(rs.getString(2));


              Blob blob1 = rs.getBlob("photo");
              byte[] imagebyte = blob1.getBytes(1, (int)blob1.length());

              ImageIcon imageic = new ImageIcon(new ImageIcon(imagebyte).getImage().getScaledInstance(250,250,Image.SCALE_DEFAULT));

              imagelabel.setIcon(imageic);

            }


        } catch (SQLException ex) {
            Logger.getLogger(empnav.class.getName()).log(Level.SEVERE, null, ex);
        }
Next >>
 try {

            if(!rs.isLast())
            {

             rs.next();
              txtname.setText(rs.getString(1));
              txtsal.setText(rs.getString(2));


              Blob blob1 = rs.getBlob("photo");
              byte[] imagebyte = blob1.getBytes(1, (int)blob1.length());

              ImageIcon imageic = new ImageIcon(new ImageIcon(imagebyte).getImage().getScaledInstance(250,250,Image.SCALE_DEFAULT));

              imagelabel.setIcon(imageic);

            }


        } catch (SQLException ex) {
            Logger.getLogger(empnav.class.getName()).log(Level.SEVERE, null, ex);
        }
< last
  try {


            rs.last();
              txtname.setText(rs.getString(1));
              txtsal.setText(rs.getString(2));


              Blob blob1 = rs.getBlob("photo");
              byte[] imagebyte = blob1.getBytes(1, (int)blob1.length());

              ImageIcon imageic = new ImageIcon(new ImageIcon(imagebyte).getImage().getScaledInstance(250,250,Image.SCALE_DEFAULT));

              imagelabel.setIcon(imageic);


        } catch (SQLException ex) {
            Logger.getLogger(empnav.class.getName()).log(Level.SEVERE, null, ex);
        }
i have attached the video link below. which will do this tutorials step by step.