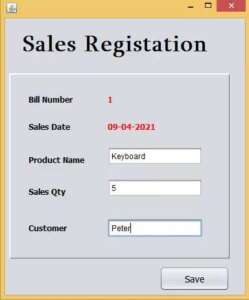
This tutorial will teach you Simple Sales Inventory System in Java and mysql.this example which will help you to learn the auto no generating using by the code.
FirstStep : we have to establish the database connection
Connection con;
    PreparedStatement pst;

    public void Connect()
    {
        try {
            Class.forName("com.mysql.jdbc.Driver");
            con = DriverManager.getConnection("jdbc:mysql://localhost/vmproducts","root","");
        } catch (ClassNotFoundException ex) {
            ex.printStackTrace();
        } catch (SQLException ex) {
            ex.printStackTrace();
        }
    }
Second Step :- Create the Function getBillNo for generating the Auto ID.
public int getBillNo()
    {
         int billno = 1;
        try {

            Statement smt = con.createStatement();
            ResultSet rs = smt.executeQuery("select max(billno) from sales");
            rs.next();
            billno = rs.getInt(1) + 1; // increment by 1 auto ID Set
            rs.close();

        } catch (SQLException ex) {
          ex.printStackTrace();
        }
        return billno;

    }
After fill the productname,salesqty,customer click addbutton record will be added in to the database.
private void jButton1ActionPerformed(java.awt.event.ActionEvent evt) {
        try {
            String billno = txtbillno.getText();
            String date = txtdate.getText();
            String pname = txtpname.getText();
            String qty = txtqty.getText();
            String customer = txtcustomer.getText();


            pst = con.prepareStatement("insert into sales(billno,salesdate,prodname,qty,customer)values(?,?,?,?,?)");
            pst.setString(1, billno);
            pst.setString(2, date);
            pst.setString(3, pname);
            pst.setString(4, qty);
            pst.setString(5, customer);
            int status = pst.executeUpdate();

            if(status==1)
            {
                JOptionPane.showMessageDialog(this, "Sales Completedddddd");
                txtpname.setText("");
                txtqty.setText("");
                txtcustomer.setText("");
                txtpname.requestFocus();
                txtbillno.setText(String.valueOf(getBillNo())); //after sales successfully Auto ID increment by 1
            }
            else
            {
                JOptionPane.showMessageDialog(this, "Sales Failedddd!!!");
            }

        } catch (SQLException ex) {
           ex.printStackTrace();
        }

    }
I have attached the video tutorial below it will help you to do this step by step.