Up next in 10

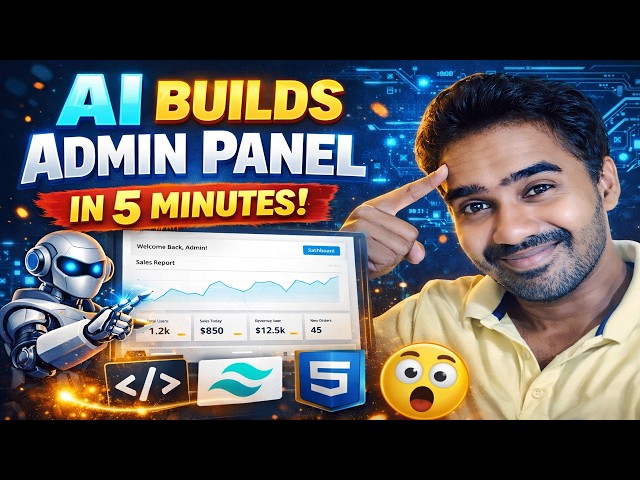
Want to build a modern admin panel in just 5 minutes? In this video, I’ll show you how to create a powerful admin dashboard using HTML, CSS, Tailwind CSS, and AI tools — fast, simple, and beginner-friendly!
Whether you're a beginner or a developer, this step-by-step tutorial will help you design a clean and professional admin dashboard HTML CSS layout without wasting hours.
💡 In this video, you will learn:
How to create a responsive admin panel
Build a modern admin dashboard
Design UI using admin dashboard HTML CSS
Use AI to speed up development
Create a complete admin panel HTML JS CSS structure
#adminpanel
#admindashboard
#admindashboardhtmlcss
#adminpanelhtmljscss
Show More Show Less View Video Transcript
0:01
Hi friends, welcome to tutor funny
0:03
channel. Today I'm going to make the
0:06
professional admin panel using a so what
0:11
I'm going to do first I'm going to open
0:13
up my VS code editor.
0:17
Okay, first we have to uh go to my D
0:20
drive and I'm going to do the new
0:24
project and make it as this one as a uh
0:28
students
0:31
uh school manage first. School manage.
0:41
Okay, I'm going to open up the new
0:43
window
0:46
code base.2
0:48
open the project in ES editor.
0:51
Now what I'm going to do is I'm going to
0:52
create a new project. So I'm going to
0:54
select this one. Click it index HTML.
1:00
Here what I'm going to here I went to
1:03
the chat dbt. Here you can see act as a
1:07
HTML CSS JavaScript developer. you have
1:10
type the you can open the new chat and
1:12
type this one okay so if I type it take
1:16
too much of time to complete the project
1:18
that's why I already type it so you can
1:20
see here so if you press enter you can
1:23
it is it will be display the some output
1:26
look like this after you have write it
1:29
here I need the admin panel using the
1:31
HTML CSS and tailwind CSS so complete
1:35
and effective very effective mean it's a
1:38
very effective codes include the
1:41
following model models. One of the what
1:43
are the modules we have to include to in
1:46
order to complete the system we have a
1:49
uh relevant modules. What are the
1:51
modules we include in the uh admit panel
1:54
student teacher enrollment payment and
1:57
dashboard report. So these are the
1:59
modules we are include then uh complete
2:02
the system. So these are the following
2:03
modules we are included. Press enter
2:05
key. This code has been generated. You
2:07
can see here.
2:10
Okay. This is symbol board it generate.
2:13
Now you can see the dashboard here. All
2:16
the what are the things we uh we
2:20
expected all the expected result will be
2:24
displayed. So I just copy it back to my
2:27
project index. HTML you paste on it.
2:31
This a code. Okay. The simple code. Now
2:34
let's save all. I'm going to run and
2:38
check.
2:43
See it's working.
2:47
So after that if you want another page I
2:50
want to tell them. You can see that tell
2:53
them
2:55
I need a
3:01
student. I need to
3:06
develop the
3:10
I need the design
3:12
of the student page
3:18
include
3:23
student
3:25
number,
3:27
name,
3:28
address,
3:30
phone,
3:32
Amen.
3:57
This one. Copy it.
4:00
I'm going to go to
4:03
Yeah, I'm going to paste.
4:05
You can write pages
4:17
don't
4:25
paste this one for everyone. Now let's
4:29
let's go and check it how the page of
4:32
student
4:34
here now you can see the complete simple
4:38
here admin panel it's a responsive now
4:41
you'll be able to add the student record
4:43
as well so these are things we have to
4:45
we have the icon and everything we have
4:49
to we have manually we have changed it
4:53
okay so simple one we have created the
4:55
dashboard as well as the So this one we
4:58
can give the link as well
5:03
student
5:05
when you click the student page you have
5:07
provided
5:08
the it's resided inside the pages folder
5:12
so you tell them pages folder inside the
5:15
pages folder student.htm text. Okay.
5:19
Save them and go back to our project
5:24
the project
5:27
then click on it. Okay. Successfully
5:30
goes to that page. Okay. It successfully
5:33
goes to that page.
5:35
Okay. Simply we have to do the things.
5:38
Okay. The teacher also the same thing we
5:40
have to do the teachers page as well. So
5:43
that uh the simple one. Okay. This how
5:45
we have to the implement the admin path
5:48
using very simple. Okay. What are the
5:51
modules we have to tell them it has been
5:54
created. Okay.
5:57
That is the thing we have to do it. So
5:59
here
6:01
uh this is a total model. So if you have
6:03
to do any any adjustment
6:06
of them uh so that page copy inside the
6:13
paste it over here. So here this one I'm
6:17
going to make it as a student one you
6:20
have to make the second one as a student
6:26
this page
6:30
I'm get this new tag all tag what I
6:33
create copy it
6:40
back to my student page
6:44
here this dashboard keypad as it is. Uh
6:47
so here inside here the main content
6:50
this main content this dashboard we need
6:54
the inside the dash inside of this
6:56
dashboard I I need my form. Okay. So I
7:00
want to paste them. Okay. So we have to
7:05
paste them
7:07
and control S to save.
7:10
And now let's
7:14
check how it works
7:21
here. It's working successfully. Okay.
7:24
Now, now you can see that dashboard. Now
7:26
you can see when you go to open the
7:29
student. Okay. Now it's working
7:30
successfully. Yeah. So the same thing
7:33
you have to do the teacher as the same
7:36
thing we have to do the teachering.
7:38
Teacher as well. So you tell them the I
7:40
told the student here how is cities copy
7:45
it I want to tell them
7:51
I'm going to
7:56
do to the teacher
8:02
module
8:04
include
8:07
T9 Teacher ID sorry uh teacher number.
8:13
Okay. Teacher what are things included?
8:15
Okay. Teacher ID we have put it as a
8:17
auto increment one.
8:22
Teacher name
8:26
uh teacher address
8:31
phone number and
8:35
okay. So
8:39
we put this code
8:44
need to be
8:46
changed
8:48
of this following code.
8:54
I'm going to do the teacher
9:00
module include teacher name uh address
9:03
phone number need to change of the
9:05
following codes. Okay, you can do like
9:07
this way otherwise
9:09
uh simple way is I teach it uh simply
9:14
rather than you have to doing like lot
9:16
of students are doing like this this is
9:18
not a good way simply you already did
9:20
this page so that then you will be
9:23
simple way is teacher
9:26
dot HTML you get the copy of the same
9:29
page only the things the student copy
9:34
this based on your teaching
9:36
Only the things you have to change these
9:38
these are things as a teachers add
9:41
teacher.
9:43
This is simple. Okay. You already create
9:46
one page. Why you again you have tell
9:49
the get the help from a okay simply
9:52
rather than you get the help from AI you
9:53
get the same modules. Okay. Here
9:55
everything same thing only the things
9:57
are different. This is the here you have
9:59
to change this student input ID here you
10:02
have to make as teacher teacher teacher
10:03
like this only thing. Okay. So now we
10:06
have to bring the uh uh we have to give
10:10
the link the teacher page for the index
10:13
page. You have to give the link as well
10:24
to save.
10:26
Bring back to the application student.
10:32
What happened? Should
10:36
I pay for WhatsApp?
10:57
Save all.
11:03
Okay.
11:05
Save all
11:10
it. Open it. Hope this is open. Click
11:12
student. It's working. Teacher.
11:16
Teacher also. I didn't give the link. I
11:18
think that's why it's not work.
11:27
I already gave the link why it's not
11:29
working.
11:33
Uh, teacher dot.
11:53
Next student it's working. Teach us why
11:57
it's not a problem. Click on it.
11:58
features it's not going
12:01
problem
12:04
dash
12:06
why it's not working that's a problem
12:29
Okay, that is not a problem. So that a
12:31
simple mistake.
12:36
Okay, let's let's check it that page is
12:38
working.
12:42
Yeah, the page is working. But the
12:43
problem is that uh thing is that uh the
12:47
problem is that uh what happened
12:52
the module we have created. So let's all
12:55
things are save again. We have check it.
12:57
But there is no problem at all. Why it's
13:00
not working? There is a problem.
13:05
Huh? Now it's working. Okay. I think
13:08
some some problem. So now it's your
13:10
teacher model is working. Okay. So this
13:12
we are doing the here you have to
13:14
instead of the button add student you
13:16
have changed as a teacher. Okay. I go to
13:18
the course section you will be able to
13:21
change it. Okay.
13:25
Teacher module you change the teacher
13:27
and as you can make it as teacher this
13:29
one. Okay. So here button also you can
13:32
change it as a add teacher. Okay. This
13:36
how you make the admin panel using
13:40
uh AI. Thank you for watching.
#Jobs & Education