Up next in 10

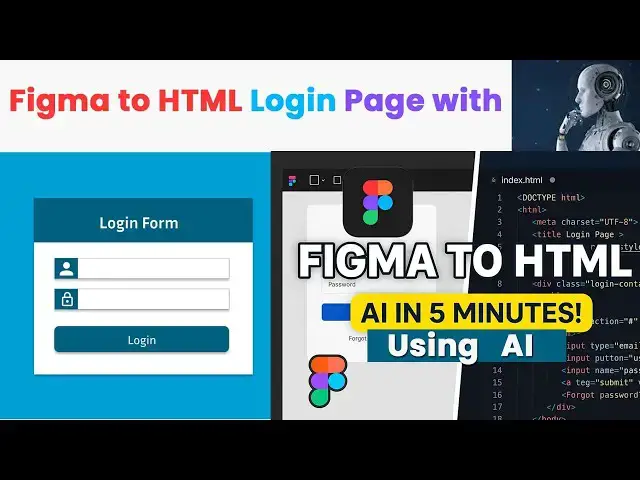
Learn how to turn your Figma login page into a fully functional HTML & CSS layout using AI and Flexbox! Whether you're a beginner or a web design enthusiast, this step-by-step tutorial will guide you through figma login page design and how to bring it to life with clean, responsive code.
In this video, we’ll walk you through:
1. How to create a professional figma login page
2. Tips for modern figma login page design
3. How to apply responsive design in Figma
4. Exporting and converting your figma UI design to real HTML & CSS
5. Using Flexbox to build layouts that work across all devices
6. A complete figma app design tutorial powered by AI!
🎯 Whether you're working on figma web design, improving your user experience design, or just looking for a great figma tutorial web design, this video will help you build beautiful and functional UIs fast.
#figmaloginpage #figmaloginpagedesign
#figma #figmawebdesign #figmatutorialwebdesign,
#figmadesign #figmauidesign
Show More Show Less View Video Transcript
0:00
hi friends welcome to tutors funny
0:02
channel in our last video I have
0:05
explained how to make this login form
0:10
using Figma
0:11
okay I already talked about okay so this
0:14
design how to convert into
0:18
our HTML CSS okay this is a UI design so
0:21
what you're going to do is first what
0:23
I'm going to do is I want to this all
0:25
the design I want to make it as group
0:28
right click you have to make it as group
0:34
this after that you have to go below of
0:36
the design here there's a option called
0:39
export click on that this option you
0:42
have to select this one as a 1x okay if
0:45
it is select 2x you have to make it as 1
0:47
x okay after that you have to click
0:49
export
0:53
He exported successfully you can see the
0:55
exported successfully so that this is
0:57
the design okay exported successfully
0:58
you have to open it okay right click and
1:01
uh open with
1:04
uh
1:06
photo
1:09
yeah this is a design you can see now
1:12
simply I need to this design in I want
1:15
to put into my
1:18
HDM so simply we have to convert this
1:21
design as a HTML rather than wasting
1:24
your time so but before you have to
1:27
touch with the AI I advise you first you
1:30
must learn HTML and CSS properly
1:34
otherwise you can't do it okay this this
1:36
AI AI works uh AI uh may convert your
1:41
design as the codes but you have to make
1:45
the adjustment if you don't have any
1:47
knowledge about HTML CSS you don't do it
1:50
okay so first you have to act as
1:55
HTML
1:57
C and CSS and flexbox
2:04
box
2:06
designer
2:10
convert
2:13
to this
2:16
image you have to tell them like that it
2:20
is convert according to the HTML CSS and
2:23
flexbox okay how to convert click on
2:26
that for add photos click on that group
2:30
for open it your photo is here uploading
2:34
weight click on that after generate the
2:38
code I have got the HTML file along with
2:40
the CSS file the CSS file this is the
2:43
HTML file here this is you will be able
2:45
to see this is the HTML they are
2:47
separate two files I created uh here I
2:50
already these two files I have put it to
2:52
this HTML file the login html CSS file
2:55
you have create separate file okay this
2:57
this login dot CSS file I have linked it
3:00
here login dot CSS the same folder okay
3:04
that you have to create a container this
3:06
container is close it you have to make
3:07
the style okay before that we have run
3:09
the code and check it whe the output
3:10
look like it is coming look like this
3:13
way
3:16
okay so we have this is not look and
3:19
feel of the design but which I gave so
3:22
how to do it this one how to go this one
3:25
i need a design look like this way what
3:27
I gave this this one this one so that's
3:31
why AI tool not generated at as it is so
3:36
we have the designer we have to do it so
3:39
this is a login container
3:41
this a login container starting and
3:44
closing
3:46
so what I'm going to do is so the login
3:49
container this is the login container
3:52
mean this is the login container the
3:53
entire container so you have to go to
3:55
that particular CSS file
4:00
the CSS file here we have a width we
4:03
have to just we have to increase as 500
4:05
let's say 500 s let's bring and check
4:09
here now so far okay with that 500 this
4:14
is not actually the text is aligned
4:16
correctly not correctly I need to be uh
4:19
as this uh text align as center screen
4:23
so how to do the thing is this is the
4:26
header section of the this one the
4:28
header section we have to put into as
4:30
this one as a flax
4:34
display flex after that I need the both
4:40
uh
4:42
virtually I need to be center and this
4:44
virtually need to be center and align
4:46
need to be center flexbox there will be
4:48
the property called justify content
4:50
center
4:52
align items center that's it now let's
4:56
you look at the design here it's perfect
4:59
simple now if you want to increase the
5:00
size little bit bigger
5:03
the font size
5:08
so font size is there i want to increase
5:10
the uh form
5:14
okay
5:16
this how you have to make it if you want
5:18
to make the font family you have to make
5:19
it as f what you need so this how we
5:22
have make it now you can see this is
5:24
very simple
5:26
everything you have to do it okay so
5:29
this one we need a drop shadow we
5:31
haven't do the drop shadow here this as
5:34
the text box also the button as a button
5:37
the button also the the
5:40
as our design we have a drop shadow
5:43
there is no drop shadow so how to use
5:45
the drop shadow the same the button drop
5:47
shadow you just copy it
5:50
paste it Over here input group input
5:52
group uh what is the group here
5:56
you can go to here testing the button
6:00
this is a button this is a text box
6:04
password and this so this type okay this
6:06
here so what I'm going to do is go over
6:09
here styles set styles
6:17
styles so border
6:20
uh flags
6:22
and we have to give the color as the
6:25
border
6:28
even here and check it
6:30
oh here it's okay
6:33
you can see here so everything you have
6:35
to think about how to do the things
6:37
think about very simple okay so this
6:39
this how we have to do it okay so
6:40
everything is we have to think think and
6:42
do it we can do it here this is the we
6:45
have done it this one you can see the
6:47
design you have to be done
6:50
we have done it
6:52
we have done it simple you have done it
6:55
so if you want to uh do the design is
6:57
very done so if you if you need the
6:59
height you have to give the spaces on
7:01
all you have to in in between here the
7:04
spaces we adjust the spaces so where's
7:07
the gap login form gap I want to make it
7:09
as 25 mean what tell me that here simply
7:13
increase it okay that's how we have
7:15
increase the sizes
7:17
okay so that we need a space between
7:19
that uh uh here
7:23
login adder we need a gap we put the
7:26
login add a gap
7:32
55 55 Five
7:38
sorry s not here login not login uh
7:43
login container
7:45
uh login header this is a login header u
7:49
height this should be uh 50 we have to
7:52
give the 50 uh we have to give the
7:54
margin so margin we have to the margin
7:57
as well margin
8:00
top
8:02
50 pixel
8:06
it's here it's fix
8:10
30 pixel
8:12
now here it's click it's good
8:18
margin
8:20
30 20 pixel is perfect
8:23
now again what is the design you get it
8:25
is according the design we have get the
8:27
output okay so that uh I need that one
8:30
so 500 is the form is very big
8:34
here it's okay it's very simple okay 450
8:44
here it's very simple this how we have
8:47
make the design very attractive
8:50
okay so very simple so first you have to
8:52
learn this property how the properties
8:53
work here first you have to have a body
8:55
this is the font size font style this is
8:57
the background color if you want to make
8:59
the background color as this this color
9:03
your
9:05
your Figma color you can give it here
9:07
this color this sign color sign what is
9:09
the color you have given this the colors
9:17
this color this color here this is the
9:19
color code you know you just get the
9:22
copy copy of this color
9:25
put into here instead of that we put
9:26
into here it automatically change
9:29
control save here it's very simple it's
9:33
not that much of a here after that you
9:36
have to write the display you have to
9:37
put the display
9:39
flex mean justify container center align
9:42
contain center mean this form align
9:44
should be vertically center
9:47
horizontally center that's the meaning
9:49
of that this height we have to provide
9:51
100 uh vh mean VH okay so so if you are
9:57
not provide this one what happen is you
9:59
can see here it's coming here so if you
10:02
put height 100% it's coming like this at
10:05
the center of the screen okay you have
10:08
to mention the height don't mention the
10:10
width of the from height you have to
10:12
mention is a the login container which
10:15
is a background color white
10:18
this a background color white this a
10:20
background color white this a background
10:22
color Right okay so we have to
10:25
understand what ID is okay after that
10:27
the shadow box shadow the width 450
10:33
border radius okay okay so what happen
10:35
is this border radius mean this a border
10:37
radius
10:39
this a border radius the width should be
10:42
450 background color this white
10:46
okay that's the thing we have simple our
10:50
header it's a flax it's a just for
10:52
content this we have to make this text
10:55
alignment as a center of the screen okay
10:57
so that the font size we have to make it
10:59
this one height and padding and
11:02
everything you have mentioned this font
11:04
should be aligned as bold
11:07
or if you come to the login form this
11:10
margin we have to say padding flex and
11:12
this this direction should be column
11:14
column in form login uh form direction
11:17
should be column in it's coming this
11:20
column format one this like this okay so
11:24
that we have made it as column
11:26
each Each and every element it gap
11:28
should be 25 after that input group flex
11:31
align center this is the border radius
11:33
white border border radius okay this all
11:36
things box shadow icons we have set
11:39
icons styling that's the things you have
11:41
to do it very simple okay very simple
11:44
okay you have to do it first before you
11:46
driving to this one you have to make the
11:48
make the good understanding of CSS
11:51
otherwise you can't do it okay so this
11:53
is a very responsive design here it will
11:56
be response
11:58
thank you for watching
#Jobs & Education