Up next in 10

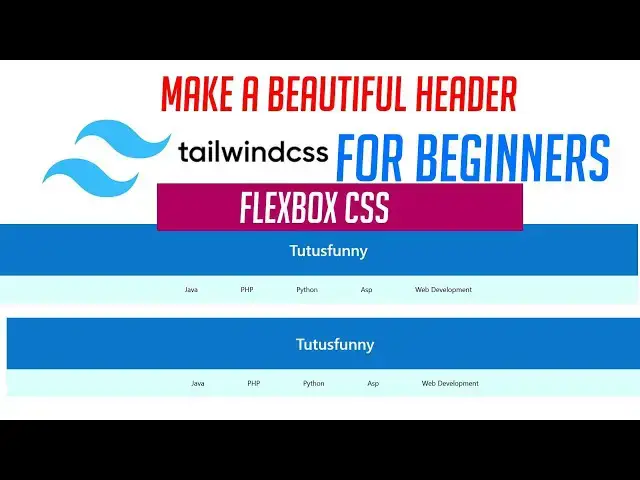
Make a Beautiful Header with Tailwind Css for Beginners
We're pleased to present this instructional video on CSS Tailwind created especially for novices! In this tutorial you'll discover how to design an stunning, responsive web header by using Tailwind CSS step-by-step -even if you've not written a single line in Tailwind before.
If you're beginning the new Tailwind CSS project or you're just getting familiar with contemporary UI design this is the ideal starting point. At the end of this tutorial, you'll know how to:
Create Tailwind CSS quickly. Utilize utilities-first classes as if you were a pro
Create an amazing, mobile-friendly header
Use flexible design principles easily
#tailwindcsstutorial #tailwindcssforbeginners #tailwindcssproject
#tailwindtutorial
Show More Show Less View Video Transcript
0:00
hi friends welcome to tuto channel this
0:02
is the front end development
0:04
step-by-step tutorial this is very best
0:07
tutorial for learn those who wants to
0:09
learn front end development you can see
0:13
this is a site so I have made this
0:15
template for Figma
0:18
so this template I'm going to convert
0:20
into tailwind CSS in my last video I
0:23
explained how to convert this in into
0:26
uh
0:29
uh convert into
0:32
HTML CSS flexbox now let's select this
0:35
one i'm going to little bit uh change it
0:38
my color as blue this is for this color
0:41
so I'm going to change it as a okay so
0:44
this template so here this color also
0:46
I'm going to change light little bit uh
0:50
blow this if you blow it this one also
0:52
that we have to write like blue
0:55
but exactly we have to get the matching
0:57
color okay that's how that that's why
0:59
that the program should be works okay so
1:01
that if you are not unable to get that
1:03
matching color it's not good okay now
1:05
here I have made it as a match matching
1:08
color okay now I'm going to make this
1:10
that this template I'm trying to convert
1:12
into headwind CSS very simple way so
1:15
what you're going to do is I'm going to
1:16
already open the
1:18
uh
1:20
VS code editor i'm going to make this
1:22
one as I'm going to do this this one is
1:24
a uh name it as that file name template
1:29
or you can put it here uh homepage
1:33
home.x text
1:36
already this home page home page I have
1:38
I have made as home page because home is
1:40
already I have created home page i name
1:44
this page as homepage in VS code editor
1:47
we have to automatically generate the
1:49
CSS along with the HTML hold on the
1:53
shift key down and press one key and
1:55
click on it you can generate it
1:58
automatically
1:59
okay right so this is your HTML this is
2:04
your this is the HTML this is the head
2:06
tag this is the body tag first time we
2:09
have to first first of all you have to
2:10
implement the HTML uh tailwind CSS
2:14
styles in your project so how to
2:16
implement that you have to go to the
2:17
respective website so you have type on
2:20
the Google and type it uh here type on
2:23
it tile when
2:27
tile CSS
2:30
uh wait for a while
2:33
i forgot to connect my internet
2:34
connection
2:37
now it will be fine it goes to that
2:40
respective website click on it link and
2:42
it's redirect to that
2:46
website so for here first what you going
2:48
to do is I'm going to go to the docs
2:54
here here this one they implement our
2:58
style and everything this is this is the
2:59
thing so I'm going to get the this one
3:02
as a CDN one so I'm going to get the one
3:04
as a CDN one so that one you have it
3:06
here that this one
3:09
past CDN you have to click on that
3:11
option you have to script this one okay
3:14
this one copy it and you paste on it
3:17
okay that's it we have got the
3:23
CSS and JavaScript both are they they
3:26
are uh developed this framework they are
3:30
the JavaScript and CSS both styles are
3:34
should be they are combined and we are
3:37
put into this link so if you have this
3:39
link you can click on it
3:43
you can you have to
3:46
can check if you click on it here this
3:47
is the these are the files
3:52
this this files made by
3:57
this file made by 10 company okay now
4:01
first what you're going to do is simply
4:03
you have to make the small blueprint of
4:06
this website so how to make the
4:08
blueprint
4:10
This sigma this is first item this is
4:13
second item so so we have to do this one
4:15
as a first item you have to make as a
4:17
first div you have to make two dives the
4:20
first div
4:22
second
4:24
okay right click format document so you
4:27
have to arrange them first and second
4:31
the first one what you're going to do is
4:33
here uh what you going to do is we have
4:35
to make implement the flex direction
4:37
before that you have to write tuto
4:42
second one you have to make the links
4:44
you have to make the links you have to
4:45
make the links you have to java do java
4:51
second one do
4:54
you have to write like this
4:57
for file links I'm going to put it uh
5:00
PHP
5:04
uh Python
5:08
ASP
5:11
web development web development
5:16
that's why
5:19
that's it now let's run on it
5:24
it's coming like this without adding the
5:26
style you can see your web page look
5:29
like this way now I'm going to implement
5:32
the styles into that i I want to
5:35
implement the style so how to implement
5:36
the style very simple uh so here I'm
5:40
going to write the simple here the uh
5:44
the stintment that makes the which makes
5:48
the CSS style very short way okay they
5:54
it help us to make the CSS file very
5:57
short okay so here you can see instead
6:01
of writing the margin and padding
6:03
normally you are writing the margin and
6:05
padding look like this way i have each
6:07
and every steps I will talk and do it
6:11
okay so you can say style
6:15
normally can write margin
6:19
sir body
6:24
normally implement what is margin
6:28
zero padding zero
6:32
the same thing in tailwind it
6:34
implemented here over here very simple
6:36
way you can see not here here we have
6:41
implemented the body very simple way you
6:43
can see if you write like this it is
6:46
coming here instead of that you have to
6:48
write it over Here
6:50
body class implemented
6:53
M0
6:56
P 0 that's it simple margin zero padding
7:00
zero in 10 years M dash 0 P-0
7:07
there
7:08
this only took this first letter only
7:11
the P P took only this first letter only
7:14
and they implement the simple way to
7:16
implement this style
7:18
two we have we we can reduce the code to
7:21
implement the code okay so that we can
7:23
save our time and we can run the
7:25
application very fast so that's why the
7:27
tailwind CSS is very low okay the the
7:31
the uh rather than we have compared to
7:34
ptm this is nowadays they are most of
7:36
the companies are doing the all the web
7:38
pages using tensor because it's very
7:41
fast okay because they implemented very
7:44
simple styles rather than we have
7:45
reduced the times
7:47
How to implement the flags so instead of
7:49
writing flags like this you can say
7:52
class
7:56
write class okay if you write it here
7:57
something I'm going to write here uh
8:00
this one should be the header
8:06
okay you have write it here implement
8:08
the flags display flags okay justify
8:12
content center content center
8:15
align item center this how we have write
8:17
the flexbox so the same thing we have to
8:21
convert into tailwind CSS very simple
8:23
way so that there are no one teach look
8:26
like this thing okay so you can see the
8:29
same thing in in flexbox how to
8:32
implement this is you have write
8:34
tailwind there is a property called flax
8:37
flax okay this this flags this way we no
8:39
need only you can took flags it
8:41
automatically uh tell me understand that
8:44
we have converted the flags after that
8:47
justify contain center we no need to
8:49
write content only you can write justify
8:52
consent here justify
8:56
justify
8:58
uh center
9:02
really simple after that align item
9:06
center you have to simply You write item
9:09
center
9:11
items center
9:15
that's it
9:17
how easy is it now you can see very
9:21
simple after that we need a padding you
9:24
have to implement the padding you can
9:25
write people don't need padding of uh 50
9:29
pixel like this the same padding
9:31
you can't implement this you can
9:33
implement this one like this it's no
9:35
problem you can put in the style and
9:36
implement it but in statement they
9:40
padding they return
9:42
P dash
9:45
uh padding that is put 10 padding okay
9:49
they are implemented 1 2 3 this is not a
9:52
pixel or this is not a uh inches like
9:54
this they are implemented something else
9:56
here this is not RM not not like this
9:59
they they inverted into uh if you want
10:04
to put the padding they implemented this
10:06
way okay p10 mean this is a the uh we
10:11
are implemented top left right and
10:15
bottom all things are we are setting to
10:16
10
10:18
okay after that text we need a size we
10:21
have to mention it text
10:24
you have to write text
10:26
for extra large
10:30
okay that's it after the font family I'm
10:33
going to write font family font sands
10:38
okay font sands which is the family BG
10:41
color we have to take that color of this
10:44
color which color
10:48
that You have write this one you have to
10:50
put ash you have pick up the picked up
10:52
the color of this color this color copy
10:56
this code put into very simple
11:00
out of the text color you have to write
11:02
text color
11:05
text white
11:08
how this is perfect these are the first
11:11
the one line which will be come in
11:15
completely cover about the section now
11:18
let's run on the project using
11:23
here ent section is working perfectly
11:26
intersection is working perfectly very
11:28
simple okay very simple
11:33
so if you if you have any doubt you can
11:35
go over here and you can check on it the
11:37
documentation this everything's a font
11:39
everything everything's a document you
11:42
have to go to the doc you can check it
11:45
okay so that all the things are there
11:47
here
11:50
flex basis everything are there
11:54
your text alignment text that things are
11:56
there you can get on it uh border color
11:59
border style outline opacity margin
12:02
black everything are there you can go
12:03
and have it with this colors everything
12:06
are you can go and help it okay very
12:09
simple right
12:12
now what you're going to do is you
12:14
applied a bolt something bold
12:18
okay this bold propert is not working uh
12:20
let's check it in bold
12:25
bold text
12:31
weight okay here you can call this class
12:34
you can hear it's called the class
12:37
uh I'm going to call this class over
12:38
here now check it okay it's working now
12:41
it's working fine perfect okay it's
12:44
working okay this simply got that talk
12:48
and get that things off okay right now
12:52
now we have made the address
12:54
successfully now I'm going to go to make
12:56
the links links also you have to write
12:59
this class
13:02
flex
13:05
after that justify contain center
13:09
so this same thing center
13:14
I can check it see center now I need we
13:18
need a gap
13:20
okay we need a uh gap
13:24
uh we can give the gap as uh 100 pixel
13:28
gap
13:30
you write gap you have to write uh let's
13:33
say uh gap you have to put it uh as 100
13:37
pixel if you have to put the pixel you
13:38
can write like this okay it's coming
13:42
simply after that we have to write a uh
13:46
bg color you have to use bg
14:04
this color
14:12
after that you have to write what the
14:13
what the thing is you have to write font
14:16
this one sans
14:20
after that you have to write uh that's
14:22
the thing you have to write it here
14:23
padding we have set this as a five need
14:26
a padding as now let's take it it's work
14:30
padding mean here five here five five
14:32
like like that padding file okay this a
14:36
font s mean a font style this a bg color
14:39
this a gaps and flux direction center
14:44
how far is it
#Jobs & Education