Up next in 10

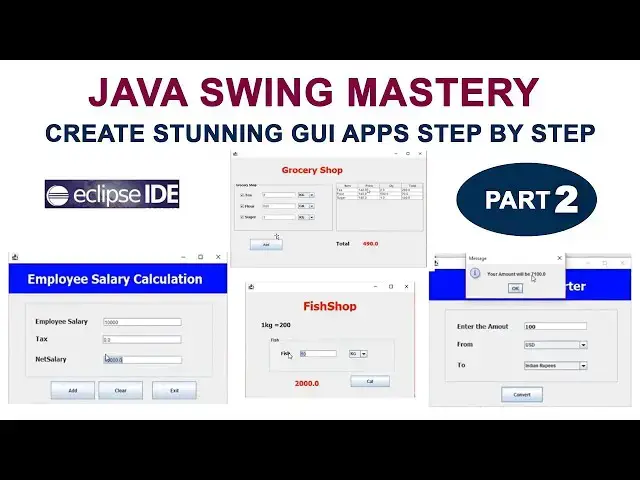
Java Swing Mastery: Create Stunning GUI Apps Step by Step | Part 2
#JavaSwing #JavaProgramming #JavaGUI #SwingTutorial #JavaDevelopment #CodingTutorial #LearnJava #ProgrammingForBeginners
Show More Show Less View Video Transcript
0:01
hi welcome back in this video I'm going
0:04
to teach how to install the windows
0:06
Builder on Eclipse Windows Builder which
0:10
will be help you to create the Joi
0:12
application in Eclipse so how to install
0:16
is go go to the help click on the
0:20
help there will be the option which is
0:23
Eclipse Marketplace click on
0:26
this this uh dialog box will be open
0:30
here there will be the Box called find
0:32
here you can find
0:35
it
0:38
Windows Builder you just type on and
0:42
press enter
0:44
key it will be
0:47
searching right you can get the result
0:49
here Windows Builder this is a Windows
0:52
Builder you have to install it right so
0:55
you just hit hit this button install
1:01
now your installation has been started
1:04
you have to wait until the installation
1:06
completed it completed successfully now
1:09
here
1:12
confirm just confirm
1:15
it now it installed all the dependencies
1:18
and all the stuff here the calculator
1:20
requirements and dependencies all the
1:22
dependency will be installed you have to
1:25
wait until the all the uh process
1:28
completed
1:32
after that click accept the term term of
1:36
the license agreements click finish
1:39
that's it now here Windows Builder is
1:43
started to installing you can see here
1:45
installing the software here this is a
1:47
percentage you have to wait until the
1:50
software get installed after
1:52
installation completed here there will
1:55
be the dialog box display restart the
1:58
eclipse ID to app the software updates
2:01
you just hit restart now now your
2:06
Eclipse ID is
2:11
restarting you have to wait couple of
2:15
minutes for restarting and apply the all
2:18
the changes what what you have uh done
2:27
correctly right now
2:31
let's now let's go
2:34
here go here file new Java
2:38
project here I'm going to create the
2:41
project as Java
2:46
GUI this a project name I'm going to
2:49
create click
2:52
next
2:54
finish here don't create right now here
2:59
this is your folder Java G application
3:03
here there will be the package called
3:06
SRC right
3:09
click
3:11
new here you have go to the
3:15
others now you can see here there will
3:18
be the new folder which will be created
3:20
as Windows Builder this is the folder
3:24
you have to check whether your windows
3:26
Builder is installed successfully or not
3:29
if is installed successfully you can see
3:32
this folder right now you can if you
3:35
expand this folder you can see here the
3:39
swing designer uh folder right you have
3:42
to expand
3:43
it inside the swing uh designer you have
3:47
to select application window this one
3:50
and click
3:52
next here you can give the name I just
3:55
give the name as
3:56
G Java
3:58
G whatever name you can give I just give
4:01
the name like this click
4:04
finish all right now you can see here
4:07
this is the Java this is the your frame
4:10
first frame I just give the name as Java
4:12
GUI you can see here right this empty
4:15
frame right so here click the design
4:19
window now your design opening your
4:22
design page this is the first time you
4:23
are opening your design page right it's
4:25
loaded I hope you guys what are the step
4:29
we have followed to install the windows
4:31
Builder on
4:33
Eclipse please do this if you have any
4:36
doubt you can ask me I will see you in
4:39
my next
4:42
video thank
4:46
you hi welcome back let's start the
4:49
lesson so this is the
4:52
frame this is called as a pallet pet you
4:56
can see there are many tools are there
5:00
now what I'm going to do is here first
5:02
tool I'm going to drag it here is the
5:05
label this is the label you just scr it
5:10
you can see the label you just click
5:14
click the label and drag and drop if you
5:18
drag and drop you can't see here
5:21
here this is the ARR you might get so
5:25
that I just track and drop right now
5:29
first what I I'm going to do is here
5:31
first I'll show the error that's why I
5:32
just drag and in this situation first
5:36
you what I'm going to do is here now I'm
5:38
going to select this one select this
5:40
Frame
5:41
again right
5:44
click layout you have to set as absolute
5:48
layout there are many layouts are there
5:51
I have set as absolute layout right it
5:56
you have to give the appropriate layout
5:59
here then only you will be able to drag
6:01
the labels so here all the compon you
6:04
can drag it otherwise you can't so now I
6:08
just click the label and dra drag and
6:11
drop for
6:13
here now here it is working perfectly
6:17
well now you can set anywhere you can go
6:21
and set it anywhere of the frame now
6:25
select the name of the label so select
6:29
the label over here you can name it here
6:32
there will be the properties if you
6:34
select this
6:35
one what are the properties available of
6:39
the labor control you can see
6:41
here these are the properties okay you
6:45
can change the label text over here you
6:48
can change you can use the tool tip when
6:51
you are when the cursor is moving there
6:54
will be the uh popup message will be
6:57
displayed it's called as a tool tip
7:01
okay so here you can set the icon
7:03
foreground color background color all
7:06
the stuff you
7:07
can uh apply on the labels so now I'm
7:11
going to first I'm going to change
7:15
the text so I'm going to change it as
7:19
name we just type here name press enter
7:22
key then only it will be play okay
7:26
here now you can see here right now here
7:30
if you want
7:32
to increase the font size you select on
7:36
this
7:38
label here there will be the property
7:41
called
7:42
font font you just click on this one
7:46
here there are the font family you can
7:48
select any family you want right the
7:51
default one I'm going to select as right
7:54
click on this one bold I I'm going to
7:56
increase the size little bit 14 click
7:59
okay now here it little bit size will be
8:05
increased right you can see here right
8:10
now what I'm going to do is here I'm
8:11
going to drag the text field so
8:16
here component you can see the text
8:19
field here just you can't see the name
8:22
well here you just here you have
8:26
to right you can adjust like this
8:30
right you can just expand it you can see
8:32
here the full name you can now easily
8:35
now you can uh check the all the
8:38
components names right so here come this
8:42
is the text field here you can here if
8:44
you just move the cursor on the
8:46
particular component it show the name of
8:49
the
8:51
uh component here if it is move the
8:54
label here this one should be the label
8:56
okay if it is move the control on J Tex
8:58
field here it show the component name
9:00
right this is called as Tool uh tool te
9:03
now I just click on this text
9:07
field here youj just drag and drop on
9:11
the
9:12
frame you just you can give the sio here
9:16
okay you can adjust the size if you want
9:18
you can reduce if you want you can
9:20
increase the size of the text field but
9:23
you need right
9:26
simple okay now what I'm going to do is
9:28
here I'm going to drag one button this
9:32
is the button I just click on the button
9:36
drag and drop on the frame there
9:40
simple now I want to name the I want to
9:43
change the name of the button not name
9:46
text default if you are track and drop
9:49
defaultly the text name will be new
9:53
button I want to change it as okay so
9:56
how to change it you just select the
9:59
button go to the property
10:03
window property
10:06
window the property called as text this
10:09
text default come as new button you can
10:11
see here I'm going to change it as
10:15
okay okay press enter key it will be
10:20
changed right
10:23
simple okay
10:26
now I'm going to run the frame so how to
10:31
run it the same way just hit the play
10:36
button it ask to save and launch Okay
10:40
click
10:41
okay you can see
10:44
here you can see the window very
10:51
simple I hope you guys you understood
10:53
the things well I'll
10:56
be I'll be see you in the next video
10:59
thank
11:01
you hi welcome back in our last video we
11:05
discussed about the labels and text
11:07
fields and buttons let's continue the
11:11
lessons now what I'm going to do is
11:14
here if I type something else on this
11:18
text field click okay button what you
11:22
type on this text field the same text
11:24
would be display below
11:27
label so what I'm going to do is here go
11:30
to the
11:32
pallet click the label you just drag and
11:35
drop
11:37
here now here what I'm going to do is
11:42
here this is the button when you what
11:45
you enter on this text field click the
11:47
button the same text would be show show
11:51
on the below
11:52
label so click on the
11:55
button right click
12:00
here we have to add event
12:04
handler action action
12:07
perform I'm going to tell you one more
12:10
time click on the
12:12
button right
12:14
click add
12:17
event
12:19
action action
12:22
for this is Step you have to follow this
12:25
is the action event of the button inside
12:29
this bracket you have to enter but uh
12:33
when you click on the button what happen
12:37
you have to tell them here you have to
12:38
tell here this is the action event of
12:41
the button okay what you when you click
12:43
the button what you have to do what is
12:45
the process you have to
12:47
do so now let's back to the design this
12:50
is a source this is a design okay so you
12:53
have two two choices here if you click
12:55
on the design you go to the design if
12:57
you go to the source you go to Source
12:59
here right now first what I'm going to
13:02
do is
13:03
here I have to this is the text
13:07
field what the name of the text field we
13:09
have
13:10
to what the name text field you can
13:14
check the property variable here name
13:17
will be text text fed okay so select
13:21
this
13:23
one right click rename here also you can
13:27
rename it okay you can rename it here or
13:31
here right so you rename it mean uh the
13:35
rename is very must if you identify the
13:38
text field here only one text field are
13:41
there if you imagine if you have five
13:44
text field each and every text field we
13:47
have to identify by the name so there
13:50
you have to rename here there will be
13:52
the right click select on the text field
13:54
right click there will be the option
13:56
rename otherwise select this text field
14:00
you can see the property window there
14:02
will be the property called variable you
14:04
select this one here also you can rename
14:06
it so I'm going to rename it here
14:09
as
14:11
txt txt
14:14
name go type like this txt name press
14:17
enter key then only the name name would
14:21
be changed right now what I'm going to
14:25
do is here I successfully change the
14:27
name of the text Fe right
14:29
now again select the button right
14:33
click add event you can go like this
14:37
way otherwise here the first time if you
14:40
set as a action perform event here there
14:43
will be the default here you have to add
14:45
only one once a time here this one it
14:48
automatically come when you again you
14:50
have to go here the action perform you
14:52
just go here it goes simply like here
14:56
now here what I'm going to do is here
14:58
I'm going to create create the variable
15:00
I'm going to create the string variable
15:02
so how to create the string variable
15:05
first you have to start with the data
15:06
type
15:08
string variable variable name I'm going
15:11
to declare as a name
15:15
equal here what I'm going to do is value
15:19
what's the value you are type on the
15:21
text field you have given here so you
15:23
have to what's the name you have given
15:25
on the text fi txt name this is the name
15:31
here press dot all the properties will
15:35
be displayed if you are give the correct
15:38
name of the text
15:40
feed sometime if you are given the wrong
15:43
name what happen sorry we are given the
15:47
wrong name press dot it won't
15:52
show right I'm going to give the correct
15:55
name
15:57
dot here there are the what you
16:00
called
16:03
getex get text so get
16:06
text col
16:10
right here what what I did so
16:14
far txt name go back to the design what
16:19
you type on that text
16:22
field what happen is this is the value I
16:26
I already told
16:27
that when you are making the variable
16:30
this is the data type this is the
16:32
variable name this is the value now
16:35
value you enter on this text field what
16:39
the value you enter on the text
16:42
field let's back to the
16:45
source the entered value will be
16:47
assigned to the name
16:50
variable
16:51
right so now what I'm going to do is
16:54
here I want to display the below label
16:59
let's back to my Design This is a below
17:02
label right so I'm going to get the name
17:06
of the below label the defaultly the
17:09
name will be set as once you drag and
17:12
drop the default name will be set as lbl
17:15
new label one I'm going to change this
17:18
one as
17:19
a label
17:22
lbl message I'm going to set as lbl
17:25
message whatever name you can give in
17:29
here give here no problem I just set as
17:31
lbl message press
17:34
key the name as been
17:37
changed right now let's back to my
17:43
source this one right now here what I'm
17:47
going to do is here now what the value I
17:51
enter on the text field it is assigned
17:53
to the name now here the value want I
17:57
want to print it out on the
18:01
label so what is the label name you are
18:04
given label
18:08
lbl message this the name of the name
18:11
you are given dot set
18:15
Tex there property called set XX here
18:19
this name you type over here name that's
18:23
it very simple only the two lines your
18:26
code will be there okay now if you
18:29
execute the program and
18:31
see what will be the
18:34
output now you have to type on here
18:40
John okay button here John will be
18:43
displayed if you type your
18:48
Peter Peter will be
18:51
displayed here you have to type on the
18:54
text field
18:56
James James will be displayed
18:59
click on this one G James will be
19:00
displayed a very simple
19:03
example this is very simple example I
19:06
have
19:07
given uh thank you for watching we'll be
19:11
see in my next
19:17
lecture hi welcome back in our last
19:20
class we saw the simple
19:22
example so here I just remove this label
19:26
just select the label and press delete
19:29
the delete key on your keyboard it will
19:31
be deleted so I'm going to do another
19:34
small example so again I'm going to drag
19:38
the label instead of drag and drop once
19:41
you drag the label the same the same
19:44
style all the stuff you can apply so
19:47
just contrl C to copy otherwise you just
19:50
select the
19:51
label go to edit
19:55
copy edit paste otherwise you you have a
19:59
shortcut key control+ c control+ v okay
20:03
if you click on this one here it will be
20:07
the same it will be copy the same uh
20:10
label here now you will be able to
20:12
change the name select this one name
20:16
propert the property window you can see
20:18
the property text here you'll be able to
20:22
change the property here I'm going to
20:23
change it as age press enter key then
20:26
only it would apply okay after that what
20:30
I'm going do the same label also I just
20:33
select this one edit copy
20:38
paste get the another label over here
20:41
now I here what I'm going to do is
20:43
change the name here over here this is
20:46
this label I'm going to change it txt
20:48
name this one I'm going to change it as
20:51
txt
20:52
H press key right perfect now what I'm
20:58
going to do is here in this video I
21:03
just reduce the size of the frame little
21:06
bit like this simple right now select
21:11
the frame here this is the uh property
21:14
relevant to the frame this is the
21:16
property relevant to the label this is
21:18
the property relevant to the text field
21:21
okay you have to understand the property
21:23
if you select the frame the property
21:24
would be different if you select the
21:27
label the property would be different if
21:30
if you select as a text Field property
21:33
would be different right you have to
21:35
understand the
21:36
difference now if you select the button
21:39
property would be different now what I'm
21:41
going to do is here uh when I click this
21:45
button okay button I have to display
21:48
name display on the name text feed age
21:51
display on the age text Fe so let me see
21:55
how to do the task so here you can
21:57
double click on this one it will be goes
21:59
to the action perform event otherwise
22:03
right click action event handler action
22:07
action perform right you have a couple
22:10
of ways to do do do this right so I easy
22:14
way you double click on this one it goes
22:16
here uh action action perform inside
22:19
here in our last video exercise what is
22:22
a code we return it is there I just
22:25
remove them now here we simply
22:29
type
22:31
txt
22:33
name dot there will be the property
22:36
called set
22:38
text set text what is the name you are
22:41
given here inside the double quotation
22:43
mark I'm going to give the name as
22:48
James press enter key after that I'm
22:52
going to write the txt
22:55
H text field
22:58
do set
23:00
text I want to display the age so I'm
23:03
going to give
23:05
the give the age as
23:09
25 so you have to give give here as a
23:12
double quotation
23:16
mark right perfect
23:19
now let's run the
23:25
program it's working now you can see
23:28
here
23:28
if you click okay button name display as
23:33
James age display as 25 here what is the
23:38
set text uh D is here what is the value
23:42
you are given here it will be display on
23:44
the particular text feed this is the
23:46
name of the text feed it will display it
23:47
said set text this is the text it will
23:51
be set on this text field this this is
23:54
the text it will be display on the this
23:57
text field this is the name of the text
23:58
field
23:59
that's the thing it does okay very
24:01
simple example you must understand the
24:03
stuff okay what is the what is the set
24:06
text
24:08
work I hope you guys you understood the
24:11
stuff uh thank you for watching I'll be
24:15
see you in my next lecturing
#Programming
#Java (Programming Language)
#Software
#Development Tools